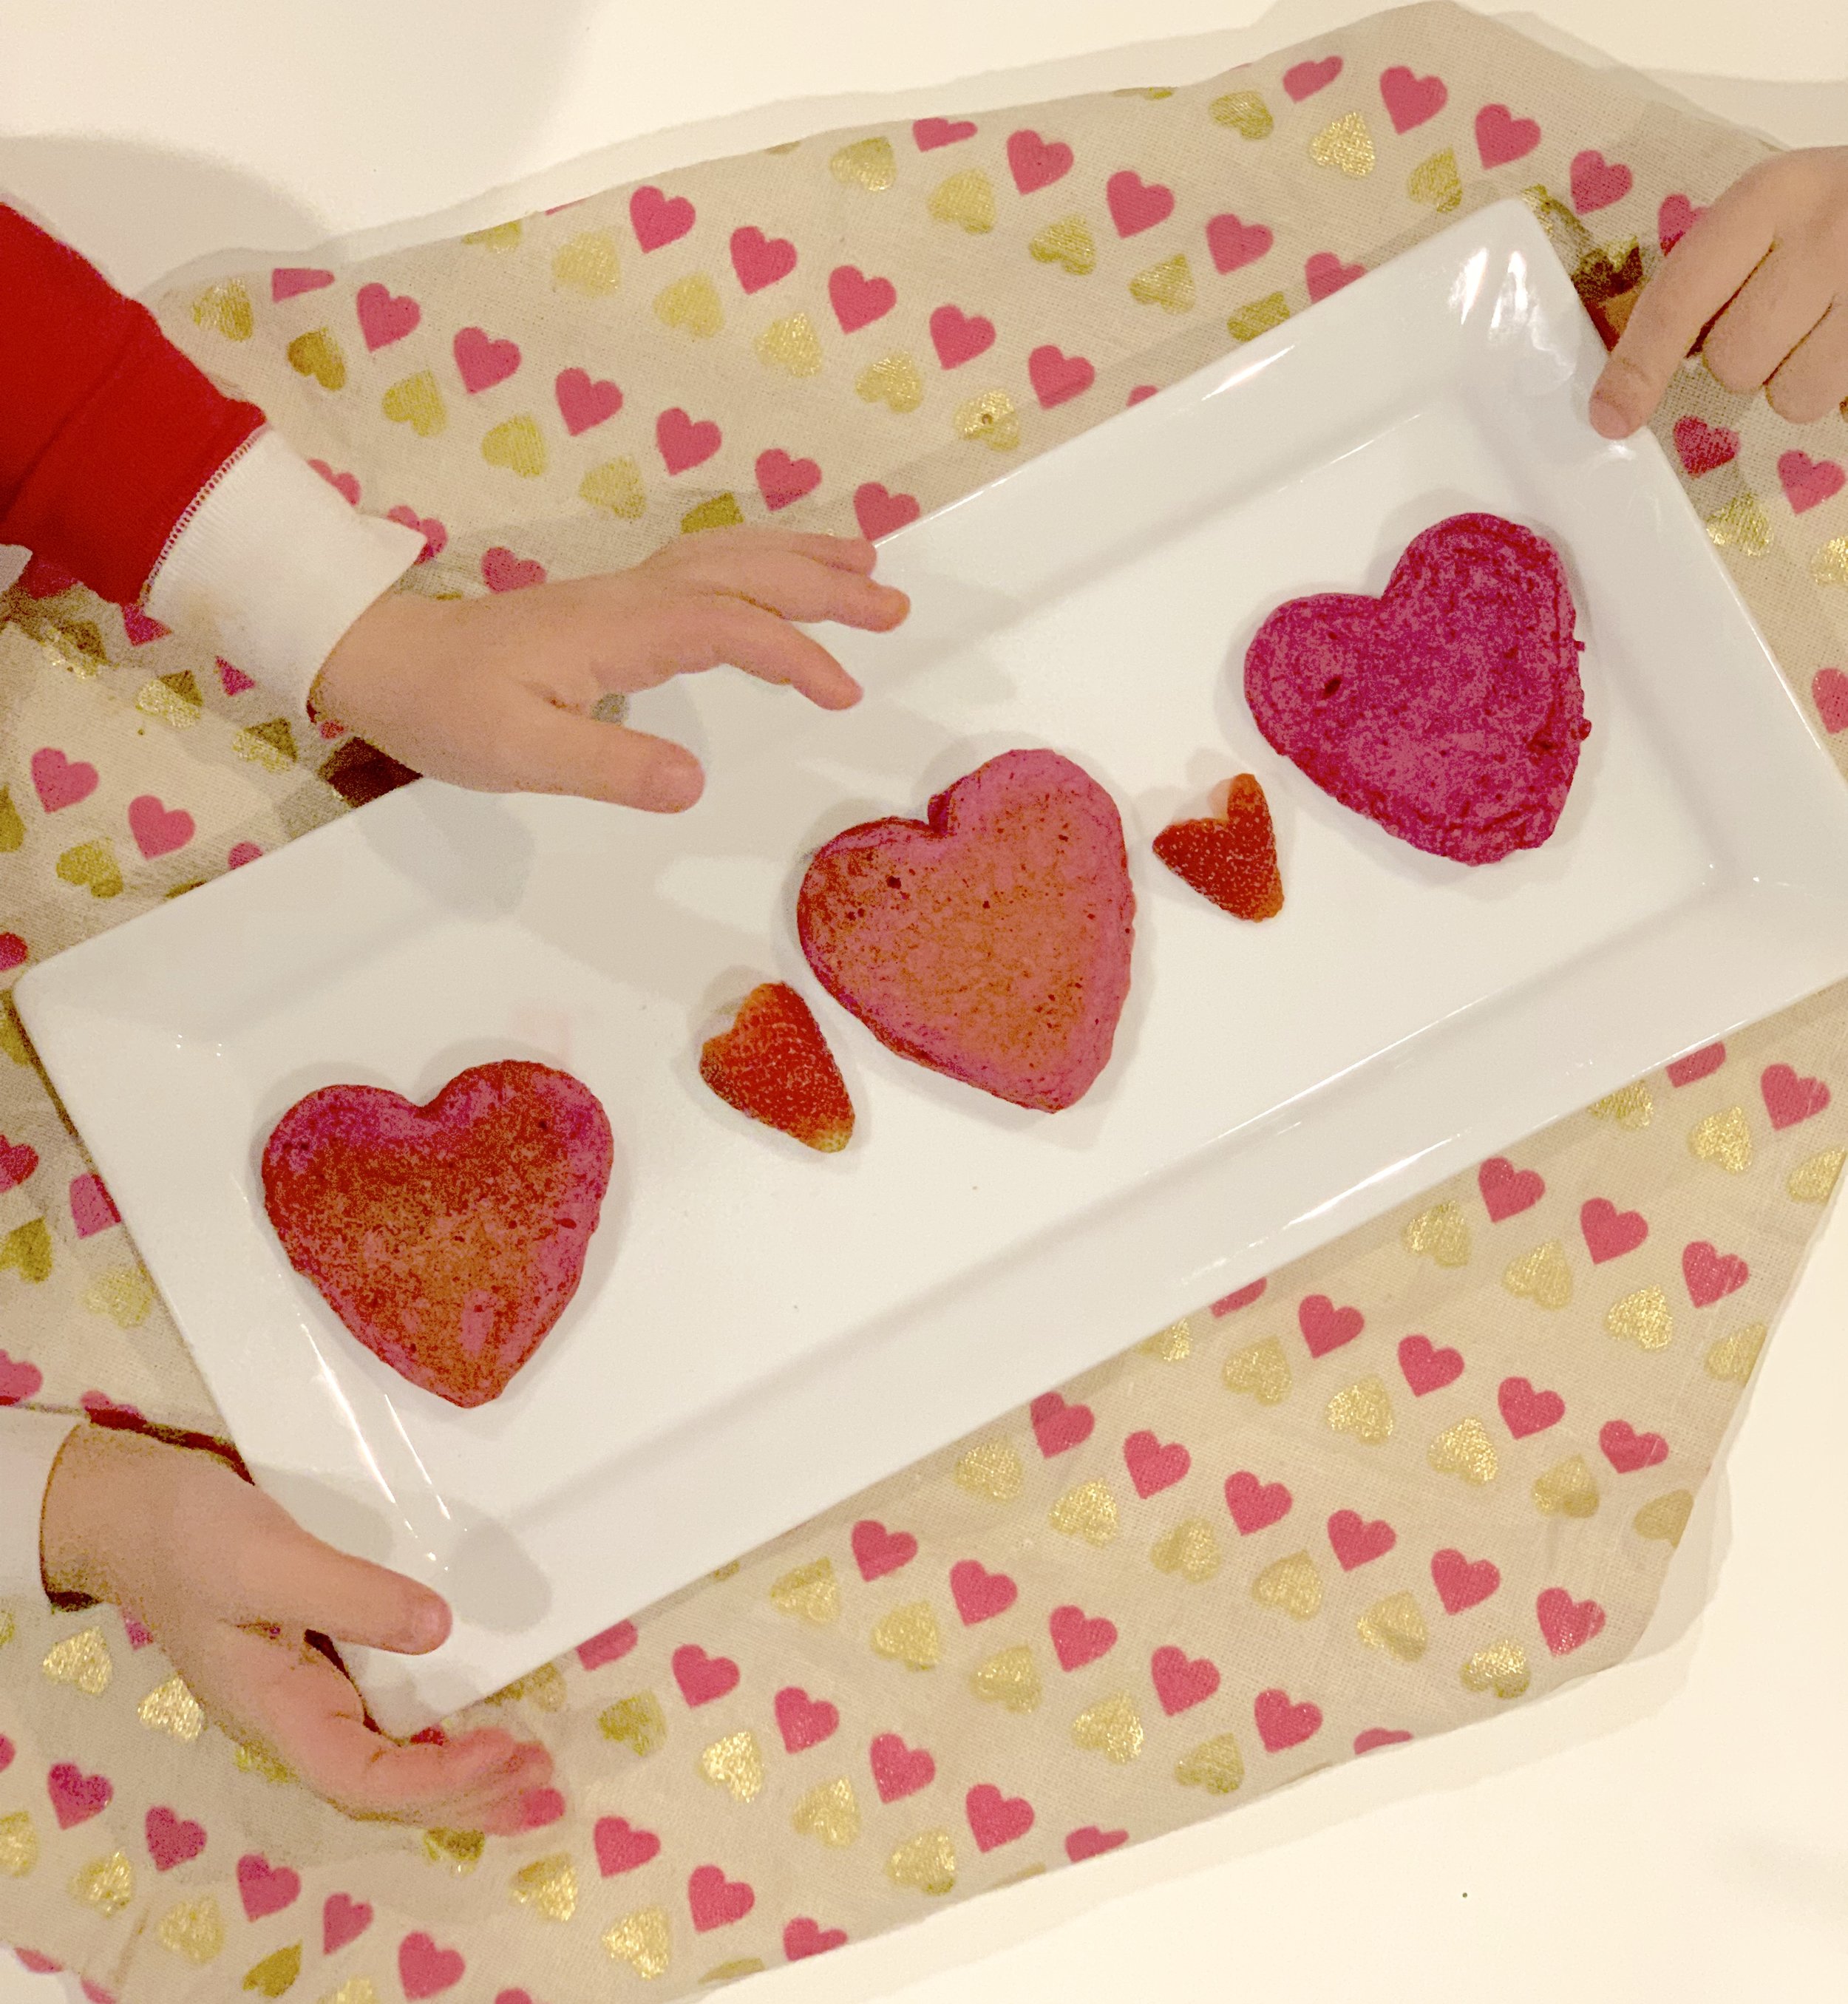
My oldest is 6! Six things I've learned in 6 years about successfully feeding kids

My oldest is 6! Six things I've learned in 6 years about successfully feeding kids

This weekend is my firstborn son's 6th birthday. I'll spare you the sob story about how fast time goes  (although it's very true!), but this particular birthday, I've been reflecting on how much we have both changed in those six short years. My oldest holds a special place in my heart not only for all the time that we had together just the two of us (sadly, my other two children never got all that one-on-one mommy time), but also because he was the reason I started this exact business. . .

Read More

Chocolate-Avocado Pudding

chocolate-mousse-2635500_1920-1.jpg

Back in 2012 when I first started teaching baby food cooking classes, a client of mine mentioned that her husband had been making chocolate avocado pudding, and that her baby was gobbling it right up. I put the idea on my imaginary list of recipes that I wanted to recreate, and then—-like every other item on my to-do list that I write in my head but never on paper—I completely forgot about it. Fast forward five years when that baby of hers is ready to graduate kindergarten, and here I am in my kitchen finally checking off this recipe. Do I regret not trying this sooner? Yes, but mostly because recently when I pay for avocados at checkout, I have to do a doubletake (2 for $5--seriously?!) and then you get home, cut it open, and it's all pit. Five years ago, if I can remember correctly, the world was a cheaper place for avocados, and hashtags like #avocadoproblems and #avocadofail and #willworkforavocados (okay fine I made that last one up), were not yet a thing.

But I digress.

In truth, this recipe was a real win for the kids, and I already am thinking ahead to tweaking the recipe for avocado-chocolate fudgsicles this summer (stay tuned!). The avocado creates a perfectly creamy texture and a blank slate that lets the chocolate from cacao powder and semi-sweet chocolate chips really shine through. It comes together in minutes after a whirl in a food processor or blender, and since it's made without refined sugar, it's a treat that I'm happy to serve my kids regularly. Also, unlike every other avocado recipe in the world, this can be made up to 24 hours in advanced and stored in the refrigerator. Because of the chocolate, there's no telling if the avocado turns brown.

Finally, another perk to this recipe is that it's allergy friendly--perfect for friends who are allergic to milk or eggs. But everyone will love it!

CHOCOLATE AVOCADO PUDDING makes 4 servings Ingredients: 2 medium ripe avocados 1/2 cup semi sweet chocolate chips 1/4 cup cacao powder* 1 tsp pure vanilla extract 1/4 cup milk (cows, almond, coconut, or even water) pinch of salt 1/4 cup pure maple syrup Directions: In a microwave safe bowl, melt chocolate chips according to package directions. Cool for a few minutes, then add them to a food processor or blender with the remaining ingredients. Blend until no lumps remain, pausing to scrape down the sides of the bowl. Transfer mousse to a bowl, cover with plastic wrap, and chill for at least 20 minutes (or up to 24 hours before serving.

*I use cacao powder instead of cocoa powder because it is much less processed than cocoa powder and it contains a crazy high amount of fiber, nutrients, antioxidants and magnesium. You can find it in the same location in the grocery store as traditional cocoa powder. Yes, it's more expensive, but we use it sparingly enough that it's worth it for us.

Pea and Mint Guacamole

IMG_5451.jpg

I'm all about feeding my family the same foods (because: sanity), and guacamole is my go-to at least twice a week. The baby gets hers mashed and spoon fed, my 3 and 6 year olds like it with chips or spread on crackers, and I do the cliche avocado toast. I love using foods that they already like as a vehicle for getting them to taste new flavors, and this is an example of that. In place of lime juice and cilantro, this springy, refreshing version is made with fresh lemon juice, mint, and peas. The peas give the guac a serving of protein (yep, peas contain this filling, muscle-building nutrient!). You could add the peas whole, slightly mashed up, or use it for leftover baby food pea puree--because cooking one thing for everyone is always a win!  

PEA AND MINT GUACAMOLE

Ingredients: 2 ripe avocados 1/2 cup peas OR 1/2 cup pea puree 1 tablespoon fresh mint leaves, chopped juice from half a lemon salt and pepper to taste

Directions:  Combine all ingredients in a bowl. Mash with a back of a fork until you reach the desired chunkiness (I like mine a little chunky; the kids like theirs smoother). Add salt and pepper to taste.

Healthier 1st Birthday Smash Cake

adorable-baby-beautiful-206347.jpg

It's so hard to believe that a full year has gone by since our baby Mae was born. She's brought pure joy into our lives because of her happy spirit and the way in which she turns her two older brothers into mushy love balls when they're around her. Baby love is the sweetest and most innocent love--that's for sure! Mae has been a great eater since I introduced her to real food at around 6 months old, and I'm cherishing this stage of feeding; she's too young to talk back or have an opinion, and she happily gobbles up everything I put in front of her. I know this stage is fleeting, so I'm enjoying every mealtime moment!

And when it came to making her first birthday smash cake, I wanted to give her something that was both delicious, but that didn't have any artificial yucky stuff like fake coloring or refined sugar. In fact, this cake is free of oils, butter, refined sugar, and food dyes. Instead, it's sweetened with lots of fresh fruit and a touch of pure maple syrup. The result is cake that has more of a muffin-like consistency--it's certainly not light and fluffy, but it IS sweet and delicious. I used cake flour for the batter, but you could easily substitute the same amount whole wheat, white whole wheat, or oat flour.

IMG_1658

In lieu of a traditional buttercream icing that uses an entire box of confectioner's sugar, I went for a whipped cream topping made pink by adding in 1/8 cup of defrosted-from-frozen raspberries. The berries turned the batter a pretty pale pink. I later tested the recipe with an equal part of defrosted-from-frozen blackberries which turned the cream a beautiful purple hue. You can add in a tablespoon of confectioner's sugar to the cream topping for sweetness (I did), or omit it all together.

Lastly, I baked this in jumbo muffin tins (it made 6), but this amount of batter would fill 2 4 1/2 inch circular cake pans.

Mae loved her smash cake and dipping her chubby little fingers in the frosting. I felt great about giving her something GOOD. The boys loved the cake too and their only complaint was about who would be the one to blow out her candle--ha!

IMG_5294

Healthier Smash Cake Ingredients: (for the cake) 1 cup cake flour 1/2 teaspoon aluminum free baking powde 1/2 teaspoon cinnamon 1/4 teaspoon salt 1 medium ripe banana 1/2 cup unsweetened applesauce 1/4 cup whole milk 2 tablespoons pure maple syrup 1 teaspoon pure vanilla extract 1 egg (for the icing) 1 cup heavy whipping cream 1 tablespoon confectioner's sugar (optional) 1/8 cup raspberries or blackberries, defrosted from frozen Directions: For the cake: Preheat oven to 350 degrees F. Spray muffin tins or cake pan with non-stick cooking spray. In a large bowl, whisk together the flour, baking powder, cinnamon, and salt. Set aside. In a blender, add banana, applesauce, milk, and maple syrup and vanilla. Blend until completely smooth. Whisk in the egg. Pour the wet ingredients into the bowl with the dry and stir until just combined; do not over mix. Divide batter evening among prepared pans. Bake for 14 minutes for standard cupcakes, 18 minutes for jumbo muffins, or 22 minutes for a 4 1/2 inch cake pan. Let cakes cool for 5 minute in the pan then transfer to wire racks. Cool completely before adding the icing. For the Frosting: Using an electric mixer, beat the heavy whipping cream and sugar, if using, until soft peaks form. Add in berries, if using, and beat until hard peaks form. Refrigerate until ready to use. Then use a rubber spatula to ice the cake. Store iced cake in the refrigerator to serve.

An Easter Classic: Grandma's Macaroni Pie

D6A44F19-52C0-4512-AE21-02BC8E63DB45.jpeg

I interrupt this recipe to share breaking news: A new highly scientific study found that calories consumed on holidays don't actually count. Are you convinced yet? Good, because you're going to need eggs (1 dozen), plain old white spaghetti (1 pound) and a teeny half pound of salty cheese. Are you still here?To the one person who hasn't clicked away in horror, you won't regret this. Because dishes created by authentic Italian Grandmas don't usually come with a recipe. But lucky for you, this was well studied as I made this alongside my grandma who told me every ingredient was measured "to taste." Hmmm... In case you're wondering exactly what the heck this is, macaroni pie is a classic Italian Easter tradition and something I look forward to every year. Unlike what its name suggests, macaroni pie isn’t actually a pie, it’s more like baked macaroni and cheese that’s cut into squares and served as an appetizer. But even that doesn't do it justice. It's salty from the freshly grated pecorino cheese, spicy from the large heap of pepper, and perfect in every way, You could serve it with a side of garlicky tomato sauce to dip, or even mixed in some steamed and chopped broccoli, but I like the way it is in its classic form--a no-frills, 4-ingredient classic.

Grandma’s Macaroni Pie

Preheat the oven to 350. Butter a 9×13 pan. Cook one pound of spaghetti according to the package directions. In a bowl, whisk one dozen eggs, 1/2 pound grated Pecorino cheese, and one tablespoon black pepper. Add the cooked spaghetti to the egg mixture (eggs will begin to cook a little, but that’s okay). Pour mixture into the prepared pan and spread into an even layer. Bake for one hour, covered with foil, until a fork comes out clean.

Green Pancakes!

IMG_4862.jpg

Is there any better excuse to force-feed your child get your child excited about green food than St. Patrick's day? I swear by baby spinach as my favorite healthy way to turn favorite foods green. It has a neutral flavor that blends seamlessly into whatever you're making: breads, muffins, smoothies, and pancakes! (Take a look at our yummy spinach muffins, here!) It gives these foods a vibrant green color--and not to mention a healthy dose of nutrients--without having to use food dyes. I've been known to blend it into pesto and even into my kids mac and cheese. Here, I added spinach to the blender with the wet ingredients of the pancakes so no evidence remains that there is spinach in these pancakes if you think your kids would be wary. But my kids are used to seeing the little green leaves go right into the blender, so they were happy to press the button and watch the milk turn green. I sweeten these naturally with banana, and you could easily replace that with 1/2 cup of unsweetened applesauce if you have that on hand. I also use white whole wheat flour so the color pops, but you could easily sub all-purpose flour or regular whole wheat flour, though the color might not be as vibrant with the latter.

Whatever you decide, this is the perfect HEALTHY green breakfast for St. Paddy's Day, don't you think?

GREEN PANCAKES makes 8 pancakes Ingredients:

  • 1 1/2 cups packed fresh spinach

  • 1 cup milk

  • 1 large egg

  • 1 medium banana

  • 1 cup white whole wheat flour

  • 1 teaspoon baking powder

  • 1/2 teaspoon baking soda

  • 1/2 teaspoon kosher salt

Directions: In a blender, combine the spinach, milk, banana, and egg  and blend until smooth. In a medium bowl, whisk together the remaining ingredients. Pour the wet ingredients into the dry ingredients and whisk until just combined. Heat a large griddle over medium heat and grease with butter. Pour 2 tablespoons of the pancake mixture for each pancake and cook until the top begins to bubble, around 2 minutes. Flip the pancakes and cook for one minute longer and serve.

Protein-packed granola!

granola-787997_640.jpg

When parents tell me that their child is ahead in reading or sports, I like to brag that mine are at least 15 years past their age when it comes to food. By that, I mean that they've channeled their future frat boy diet and could live off of cereal at every meal. 

 In fact the single food truth I swear by, is that if you pour it out of a cereal box, they will eat it. There are a whole bunch of good-for-you cereals out there (more on that HERE), but cereals for breakfast can fall short on the protein they need to sustain them until snack time.

In fact, the best breakfasts for kids (and adults too!)  have 3 components to keep you full and energized:

  1. Protein (found in eggs, yogurt, lean deli cuts, cheese, and nut butters)

  2. Whole grains (found in oatmeal, whole grain breads, multigrain waffles, and cereals)

  3. Fruit

Most kids don't have trouble eating the latter two as their morning meal, but protein at breakfast can be harder for them to swallow--especially since the morning rush leaves little time for frying up a few eggs. Enter your child's (and your!) next best option: homemade granola. This version is made with protein-packed oats, grains, and seeds. And unlike store versions, it's not full of crazy amounts of added sugar. It's also crunchy (a win with kids!), full of filling fiber, and made with and nuts and seeds for healthy fats to give the brain a big boost. But best of all, it is delicious.

Think of this recipe as a blank slate: If you don´t have all the ingredients,  feel free to skip some or replace other nuts, dried fruits, or seeds. Best of all, this keeps well in the freezer, so you can make a big batch and always have it on hand.  

My kids and I eat it with wild blueberries, ½ banana and low fat yogurt. You could also pour it into an old cereal box (shhh!) if you really want them to love it. 

Protein-Packed Granola 

Makes 4 cups (I usually double it since it goes fast in our house)

Ingredients:

1 cup rolled oats ¼ cup wheat germ ¼ cup flax seed ¼ cup raw sunflower seeds ¼ cup chopped raw almonds ¼ cup chopped raw walnuts ¼ cup raw pumpkin seeds ¼ cup dried unsweetened grated coconut 2-3 Tbsp. canola or olive oil 2-3 Tbsp. maple syrup or honey ¼ cup water ½ cup of mixed dried berries like raisins, apricots or cranberries

Directions.

Preheat the oven to 300 degrees. Line a baking sheet with parchment paper.

In a large bowl, mix together the oats, wheat germ, flax seed, coconut, sunflower seeds, almonds, walnuts, and pumpkin seeds.

In a small bowl, mix together the oil, honey or maple syrup, and water in a small bowl. Pour the liquid into the oat mixture and stir until it is well incorporated.

Spread the mixture the mixture on the baking sheet. Transfer to the oven and bake until crisp and golden, about 30 minutes, mixing occasionally so everything cooks evenly.

Let the mixture cool completely on the baking sheet, then return the mixture to the large bowl and stir in the dried fruit. Store in an airtight container at room temperature (it'll last for at least a few weeks) or transfer to the freezer.

Better baby food: zucchini with nut-free pesto (plus a bonus family recipe of pesto chicken risotto!)

IMG_4305.jpg

One of the most common questions I get from parents who are making their own baby food is "What's next?"Once their baby has moved beyond single-ingredient purees, they're ready to introduce more flavors, but aren't quite sure where to start. The baby phase when your little one is happily gobbling up everything is THE best time to introduce a whole variety of foods. In fact, studies show that babies who are exposed to a variety of flavors before age 1 eat a wider variety of foods at age 6. Talk about a victory for pickiness!

My philosophy has always been to cook once for everyone in our family--and with three kids 5 and under, it's a true sanity saver. For this recipe, I used both the zucchini and one batch of nut-free pesto to create meals for everyone from my 10-month old baby to my 40-year-old husband and everyone in between. My kids love pesto--they call it their favorite green sauce, and we put it on everything: as a spread on a sandwich, stirred into risottos, and tossed with pasta. I used a nut-free version here since I'm not quite ready to introduce nuts to the baby, and so that I dont have to worry about sending the kids to school with it on a sandwich. I also gave it an extra health boost by adding in a heaping handful of baby spinach, which has such a mild flavor that no one can tell the difference!

I started by shredded a combination of zucchini and summer squash and sauteeing it in olive oil in a deep lidded skillet until it was completely soft. While that was wilting down, I made the pesto in a food processor, and scraped all by about 1 teaspoon out into a bowl (it seriously takes less than 2 minutes to make!). For the baby, I removed 1 1/2 cups of sauteed zucchini and summer squash, and added it to the food processor and blended it all together. Her meal was done! I serve it in these Sage Squeezie Double Zipper Reusable Food Pouches

The rest of the squash I left in the saute pan and continued with the pesto chicken risotto (the full recipe is below). It's an easy, veggie-packed, 1 pot meal that my family loves. I hope yours does too!

NUT-FREE PESTO In a food processor, combine 1 bunch of fresh basil (discard the thick stems), a handful of fresh baby spinach, 1 garlic clove, juice of 1 lemon, 1/4 cup grated parmesan cheese, and a half cup of olive oil. Process until smooth, pausing to scrape down the sides of the bowl to incorporate all the ingredients.

PESTO CHICKEN RISOTTO Ingredients: 2 tablespoons olive oil 3 pounds of zucchini and summer squash, shredded 2 cups organic brown rice 1.5 pounds boneless skinless chicken thighs 5 1/2 cups organic low sodium chicken stock 1/4 cup pesto or more to taste* extra parmesan cheese for serving

Directions: In a deep lidded skillet over medium heat, saute squash in olive oil until wilted. Remove 1.5 cups for baby food if using. Add rice, chicken, and stock to the skillet. Bring to a boil, then reduce heat, cover and simmer until rice is cooked through, around 30 minutes. Stir in pesto, adding more to taste. Serve with extra grated cheese.

*store leftover pesto in the freezer in a covered airtight container

Healthy Double Chocolate Zucchini Muffins

food-2940558_1920.jpg

To this day, whenever I give my 5-year-old a muffin, he asks me "Is there Zucchini in it?" As a picky tot, muffins were one of my favorite ways to sneak in an extra veggie—until he learned my tricks.  But if there's one thing he can't resist, it's chocolate, and these muffins offer up a double dose of that. They taste decadent and super chocolately, but they're also packed with not 1, not 2, but 3(!) types of fruits and veggies: a hefty dose of zucchini, banana, and applesauce. The end result is something so rich, that you would never guess they're good for you. Make a big batch, and stick them in the freezer so you can pop one out for lunch boxes or heck, even breakfast. They'll keep for up to three months in the freezer in an airtight container or for 2 days in the refrigerator.

HEALTHY DOUBLE CHOCOLATE ZUCCHINI MUFFINS makes 16 regular sized muffins

Ingredients: 1 1/4  cups whole wheat flour 1/4 cup unsweetened cocoa powder 1 teaspoon baking soda 1 teaspoon salt 2  ripe bananas 1/4 cup olive oil 2 eggs at room temperature 1/3 cup sugar 1/2 cup unsweetened applesauce 1/4 cup milk 1 teaspoon vanilla extract 2 cups shredded zucchini (about 2 small) 1/2 cup mini chocolate chips Directions: Preheat oven to 350 degrees. Spray two 12-cup muffins tin with cooking spray. In a medium bowl, whisk together flour, cocoa powder, baking soda, and salt. In a large bowl, mash bananas until no big lumps remain. Stir in oil, eggs, sugar, applesauce, milk, and vanilla until combined. Add zucchini and mix. Stir the flour mixture into the wet ingredients until just combined. Mix in chocolate chips. Using a 1/4 cup measuring scoop, divide batter evenly into prepared muffin tins, and bake for 20-22 minutes.

Kid-approved kale smoothie

green-2607334_1920.jpg

We're in a deep freeze of January when everyone seems to have the sniffles. I live firmly by the belief that one of the best ways to stay healthy (aside from hand washing!) is through food. Eating healthy foods truly can boost the immune system when you need it most--and perhaps there's no better food for health than kale. It contains cold-fighting vitamins A, C, K and zinc PLUS protein, calcium and omega 3s.

Before you roll your eyes when I tell you that we start most mornings with a green smoothie, I'll first make my case on how easy it is to do (seriously!). Baby kale and strawberries store right in the freezer, so there's no need to keep fresh produce around. Plus, I'll make a big blender full and use it for two days in a row (just give it a whirl, and you're good to go!).

One of my most successful strategies with my kids has been to start easy on the kale and work your way up. Since kale has a stronger flavor profile than spinach, go light on the kale on your first batch, and gradually increase it as your kids get used to the taste. I hope your kids like this version as much as mine do!

Kid-approved kale smoothie

(makes 2 8-ounce smoothies) Ingredients: a handful of kale leaves, stems removed or baby kale 3 frozen strawberries 1 banana 1 cup almond milk (sub regular milk) (optional) 1 teaspoon honey* Directions: Mix all ingredients in a blender until smooth, add some water if it is too thick. Store in the refrigerator for up to two days (reblend before serving since ingredients will separate).

*Do not use honey for babies under age 1

Homemade baked French fries

FE569396-974F-4C69-90D2-4B067C43DE70.jpeg

We’re deep into the throws of Christmas vacation gone way too long—10 straight days of frigid sub zero temps followed by a blizzard that’s cancelled school the week the kids are supposed to be back (and parents are supposed to be breathing a sigh of relief). It’s been a long two weeks in the house, and although January normally calls for healthy recipes, we’re craving some serious comfort food. And a babysitter. We’re craving that too. But until than, we’ll take these homemade French fries. While many versions of homemade baked fries end up soggy and sad, this version gets extra crisp by preheating the baking sheet in a hot oven and arranging the fries in a single layer. But perhaps the most important part is resisting the urge to touch them while they are cooking. Let them get crunchy and crisp up while you play referee on boredom-fueled wresting matches/ fights over what’s on TV / general sibling showdowns that happen when you spend wayyy to much time together. What, is it only us?


Baked French Fries

Place a baking sheet in the oven, and turn your oven to 400 degrees. Scrub and pat dry 3 medium russet or Yukon gold potatoes.

Cut potatoes into evenly sliced 1/4 inch sticks (sticks should be evenly sliced to ensure they cook evenly). In a medium bowl, toss potatoes with 3 tablespoons canola oil, 1 1/2 teaspoons salt and 1/4 teaspoon pepper. Using an oven mitt, remove baking sheet from the oven. Spread fries on preheated baking sheet in a single layer, and making sure the flat side of the fry touches the sheet (and be careful since the baking sheet is hot!). Return to the oven and cook for 25-30 minutes, or until the bottom of the fries are a deep golden brown. Remove from oven, and use a metal spatula to remove fries from the tray. Season with extra salt to taste while they’re still warm.

Your perfect chicken soup

Untitled-design.png

With a newsfeed that's overflowing with pictures of Christmas cookies and holiday goodies, this chicken soup is begging you: STOP AND LOOK AT ME! If your kids are like mine, they're living on the Buddy The Elf diet of cookies and candy canes. Everywhere we go--school, holiday parties, stores--someone is serving them some sort of sweet treat. Rather than fighting it (hello, meltdowns), I use this month to stay balanced at home, making sure that their regular meals are ones that will keep them healthy despite the month-long sugar rush.

For me, soup is always the answer. I can make a big batch of it that they'll eat for the week (I freeze leftovers), and my kids happily slurp up the veggies. Plus, there's nothing more comforting during an arctic chill (brrrr!).

In this version, I omit pasta and rice (though you can add a cup of either--just be sure to increase the amount of stock by 2 cups), and I flavor it with fresh herbs that I tie in a bundle to season the soup while it's cooking and then remove it before serving (read: lots of flavor without complaints about "the green things"). I also use bone and skin on chicken thighs, which add tons of nutrients and flavor.

Your Perfect Chicken Soup makes 10 cups Ingredients: 2 tablespoons olive oil 1 1/2 cups carrots, peeled and diced 1 1/2 cups celery, diced 1 yellow onion, diced 1 medium sweet potato, peeled and diced 2 pounds organic chicken thighs fresh parsley, thyme and dill (or any combination of herbs that sound good to you) 8 cups organic low sodium chicken stock **(See note below) salt and pepper Directions: In a large stock pot over medium heat, add carrots, celery, onion and sweet potato. Cook, stirring occasionally, until veggies are fork tender around 8-10 minutes. Meanwhile, gather herbs in a pile and use a piece of kitchen twine to tie into a bundle. Set aside. Add chicken, stock and herb bundle to the pot. Increase the heat to bring to a boil, then lower the heat and simmer until chicken is cooked through (around 20-30 minutes). Using tongs, carefully remove chicken from the pot and place onto a cutting board. Let cool for 5 minute before handling, then discard skin and bones. Roughly chop chicken and return to the pot. Remove herb bundle and season the soup to taste with salt and pepper. Serve with crust bread or grilled cheese (my kids' favorite).

**Chicken broth/stock is one of those foods that's sneakily high in sodium. I buy low sodium varieties and then season the soup to taste with salt and pepper at the end

Recipe: Squash and Apple Soup

pumpkin-soup-2972858_1920.jpg

I've always found that when it comes to Thanksgiving recipes, simplicity wins. Amidst all the heavy appetizers, a massive main meal, and the loads of desserts, this soup stands out as satisfyingly simple in its elements (it contains only 5 ingredients if you don't count the butter) and with all the flavors you crave on Thanksgiving day. It also gets its creaminess from the pureed squash--yep, there's no cream here--which is a welcome relief from the loads of rich and decadent foods.

In fact, I've made this soup almost every year for the past decade as a Thanksgiving appetizer, and it's a win with everyone. With subtle sweetness from the apples, it's a crowd pleaser for kids and adults. I serve it in the slow cooker, set on low, so it stays piping hot. Add pomegranate seeds to garnish, and the colors are vibrant and beautifully Fall in nature.

There are many ways to make a squash soup, and I always use Thanksgiving as an excuse to take shortcuts. You could buy a whole squash and cut it up yourself (more on how to do that here), or you could go for my choice and buy the more convenient (albeit: more expensive) prechopped squash.And like all soups, the longer it simmers, the better the flavors develop, so be sure to make this early Thanksgiving morning or even the day before. I've even made this a week or two before Turkey Day and kept it frozen until the day of, and no one was all the wiser.

If you have a baby, this soup too is a winner! It's the perfect pureed consistency for babies who aren't quite ready for textures, but it also contains delicious flavors and spices to help expand their little palates.

Squash and Apple Soup

Ingredients:

2 tbsp. butter

2 medium onions, diced

3 tsp curry powder

3-pound butternut squash, peeled, seeded and cubed (or around 3-4 cups butternut squash cubes OR 3 cups of butternut squash puree)

2 apples, peeled, cored, cubed

·3 cups chicken stock

salt and pepper to taste

Directions:

In a large pot over medium-low heat, melt the butter. Add onion and saute until tender. Stir in curry powder

Add squash, apples, chicken stock and salt. Bring to boil, reduce heat and simmer for 25 minutes or until squash and apples are tender

Use an immersion blender to puree the soup, or alternatively, transfer to the soup in batches to a blender (careful, it will be hot!). Serve warm with pomegranate seeds as a garnish.

Recipe: Cinnamon Apple Chips

dried-apples-1049483_1920.jpg

One thing is for sure at this time of year: You're going to be eating a lot of apples. Here in November, apples are the only fresh fruits left at the farm stand, and that fruit (along with pears and bananas), will be what my kids survive on until citrus season begins this winter. Happily, my kids LOVE apples--our family goes through at least a dozen a week!--but it's also nice to change things up a bit.

This recipe for baked apple chips is so simple, and it's the perfect project for a rainy homebound weekend day. All you have to do is slice the apples nice and thin, let the kids sprinkle on sugar and cinnamon, and then set them in the oven on low for an hour. Your home will smell wonderful all day, and you'll end up with sweet and crispy chips that are perfect for snacking by the handful or packing into lunch boxes.


Cinnamon Apple Chips

Ingredients:

2 apples

½ tsp cinnamon

½ tsp sugar

Directions:

Heat oven to 250 degrees. Line a baking sheet with parchment paper

Core the apples. With sharp knife, slice off 1/2-inch from top and bottom of apples and discard. Saw gently crosswise into very thin (1/8-inch) rings

Arrange apples on the baking sheet in a single layer. Place the sheet on the middle shelf in oven, and bake for 45min-1 hr until apple slices are lightly browned and almost dry to touch.

Let chips cool on racks completely before storing in airtight container.

Pumpkin Hummus

IMG_3755.jpg

With all the adorable treats there are to buy and make (and eat!) on Halloween, it's refreshing to have something that you can serve that feels slightly redemptive. Especially if you're a parent like me who likes to steal their kids' Halloween candy in the name of safety. As in: "Hmm, that Butterfinger packaging looks iffy. I'm going to have to confiscate that." This pumpkin hummus has all the feels for something that looks super spooky (it's orange, after all!). And you could serve it with black tortilla chips and  baby carrots, or even top it with plastic spiders!

Plus, with 5 simple ingredients and 2 minutes to pull it all together, it's totally doable to make despite the chaos of the crazy day. We promise it's worth it!

Pumpkin Hummus

In a food processor, add 1 garlic clove, 1 can drained and rinsed chickpeas, 1 cup canned pumpkin, juice of 1/2 lemon, and 1/8 teaspoon of ground cumin. Puree until completely smooth. Season to taste with salt and pepper.


8 Not-Sweet Halloween Treats

This year, when my son's class passed around a list of items that parents could contribute to the school Halloween party, I couldn't believe what was on the list: cookies, munchkins, cupcakes (and fine, fruit).  But with the amount of candy kids eat on Halloween, isn't it overboard to add even more to their daily sugar quota? We know your kids are going to be all hopped on sugar (mine go totally sugar wild!), but these genius non-sweet, super-spooky ideas are so cute that it just might tempt your kid to put down the candy for a half second.  

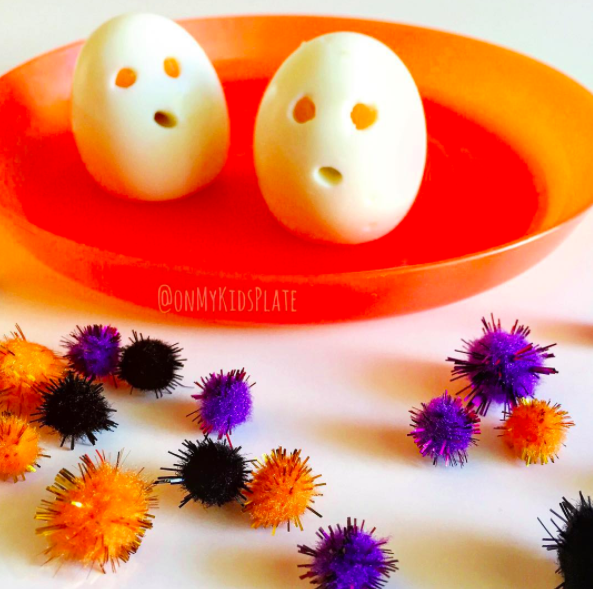
  1. SPOOKY EGG GHOSTS (from @onmykidsplate) Easy enough for non-pintrest mamas (raises hand), these help balance out the sugar with a hefty dose of protein.

Screen Shot 2017-10-25 at 10.30.13 AM


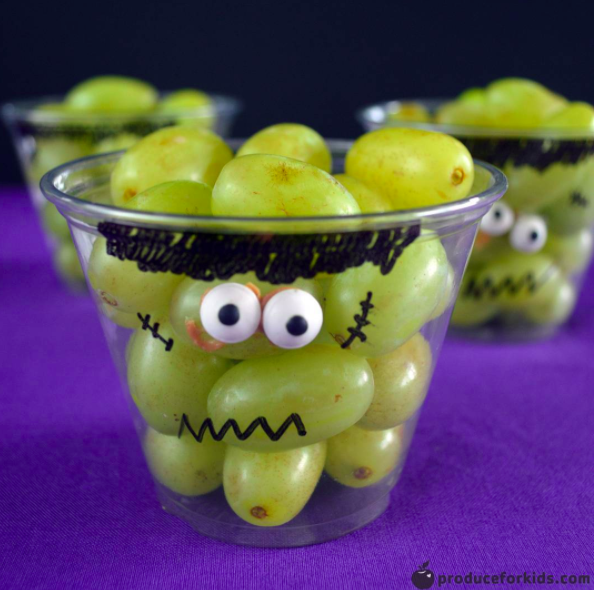
2. MUMMY GRAPES CUPS (from @produceforkids). Use a black sharpie and clear plastic cups to create an adorable snack.

Screen Shot 2017-10-25 at 10.32.45 AM


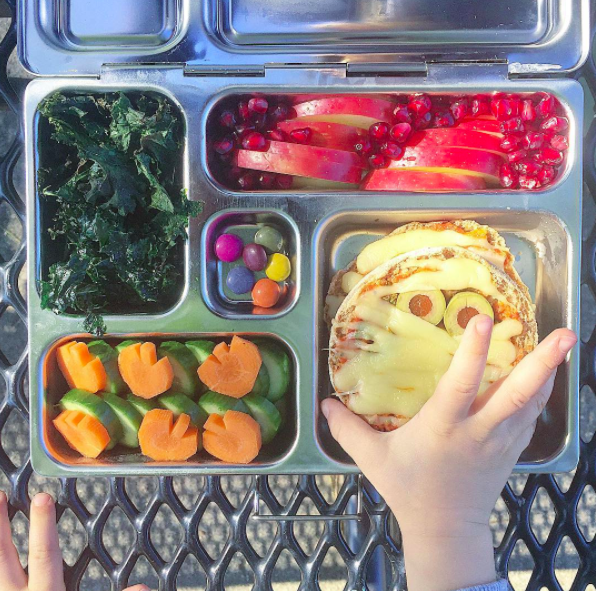
3. PIZZA MUMMIES (from @heather_kidskitchen). For when you're begging your children to eat dinner. String cheese and olives for eyes transform the plain old pizza bagel into something that screams Halloween.

Screen Shot 2017-10-25 at 10.34.32 AM


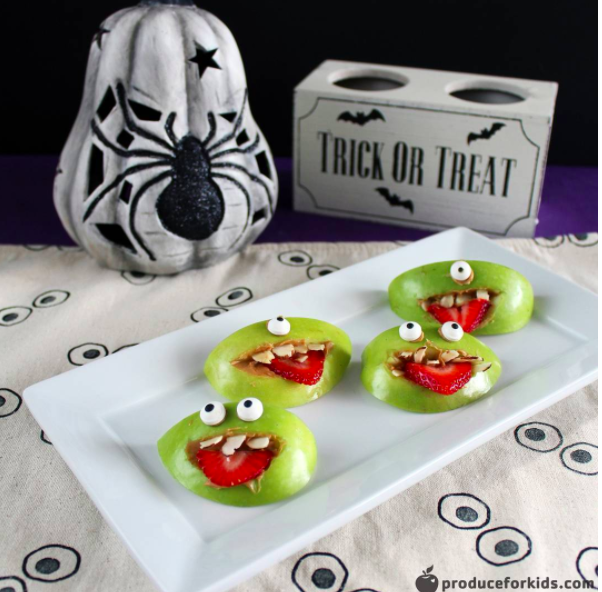
4. APPLE MOUTHS (from @produceforkids). Use almonds for teeth, strawberries for a silly tongue, and peanut butter or sunbutter to hold 'em in place.

Screen Shot 2017-10-25 at 10.38.03 AM

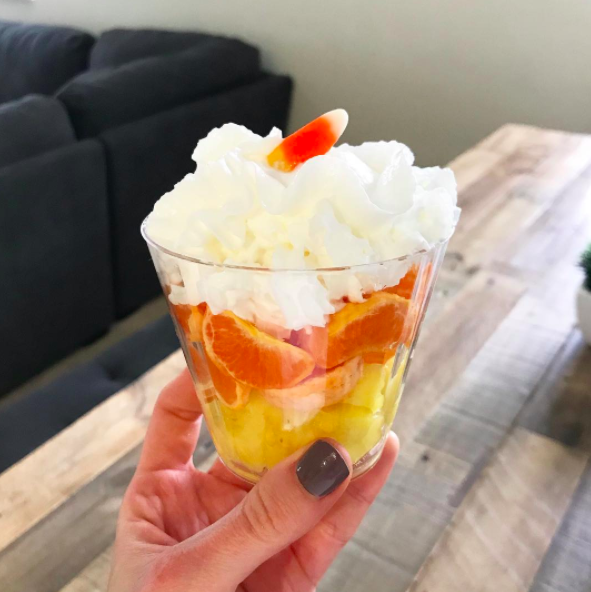
5. CANDY CORN CUPS (from @morepleasemama). A mixture between a treat and healthy fruit, this is one the kids will definitely eat (at least the top layer!)

Screen Shot 2017-10-25 at 10.43.48 AM


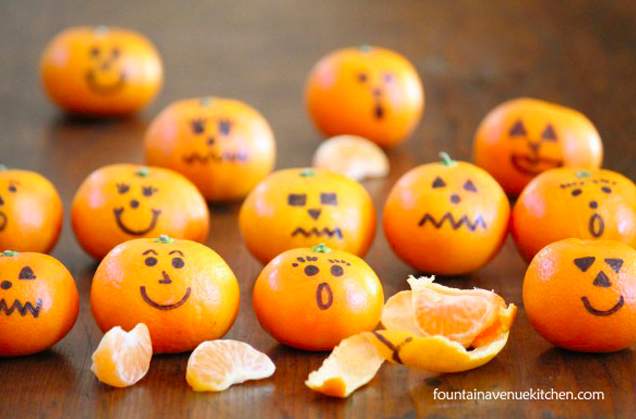
6. CLEMENTINE JACK-O-LANTERNS (from @fountainavenuekitchen). All you need is a black sharpie and an ability to draw triangles.

Screen Shot 2017-10-25 at 10.50.08 AM


7. MUMMY HOTDOGS (from @allrecipes) Stretch out strips of puff pastry dough and go to town!

Screen Shot 2017-10-25 at 10.52.05 AM


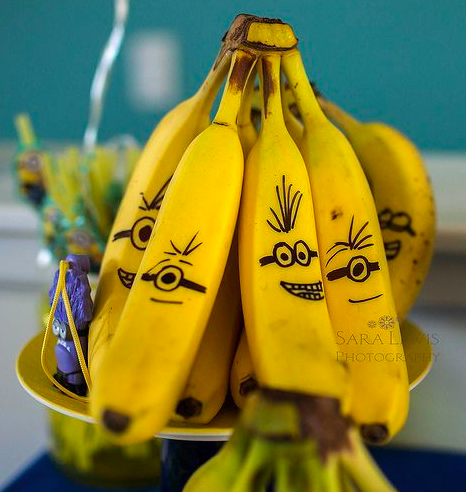
8. Minion Bananas (from @saralewisphotography ) There are ways to make these super silly by glueing on eyeballs and wrapping the bottoms in blue tissue paper. Or you could just do this and the kids will love them anyway.

Screen Shot 2017-10-25 at 10.56.21 AM


Beet baby food puree

beet-baby-food.jpg

Ages: 8 months+ Technique: Roasting. Check out our cooking guide to learn which other vegetables require this method of cooking.

Turn it into: ROASTED BEET HUMMUS!  Get our recipe for beet hummus here.

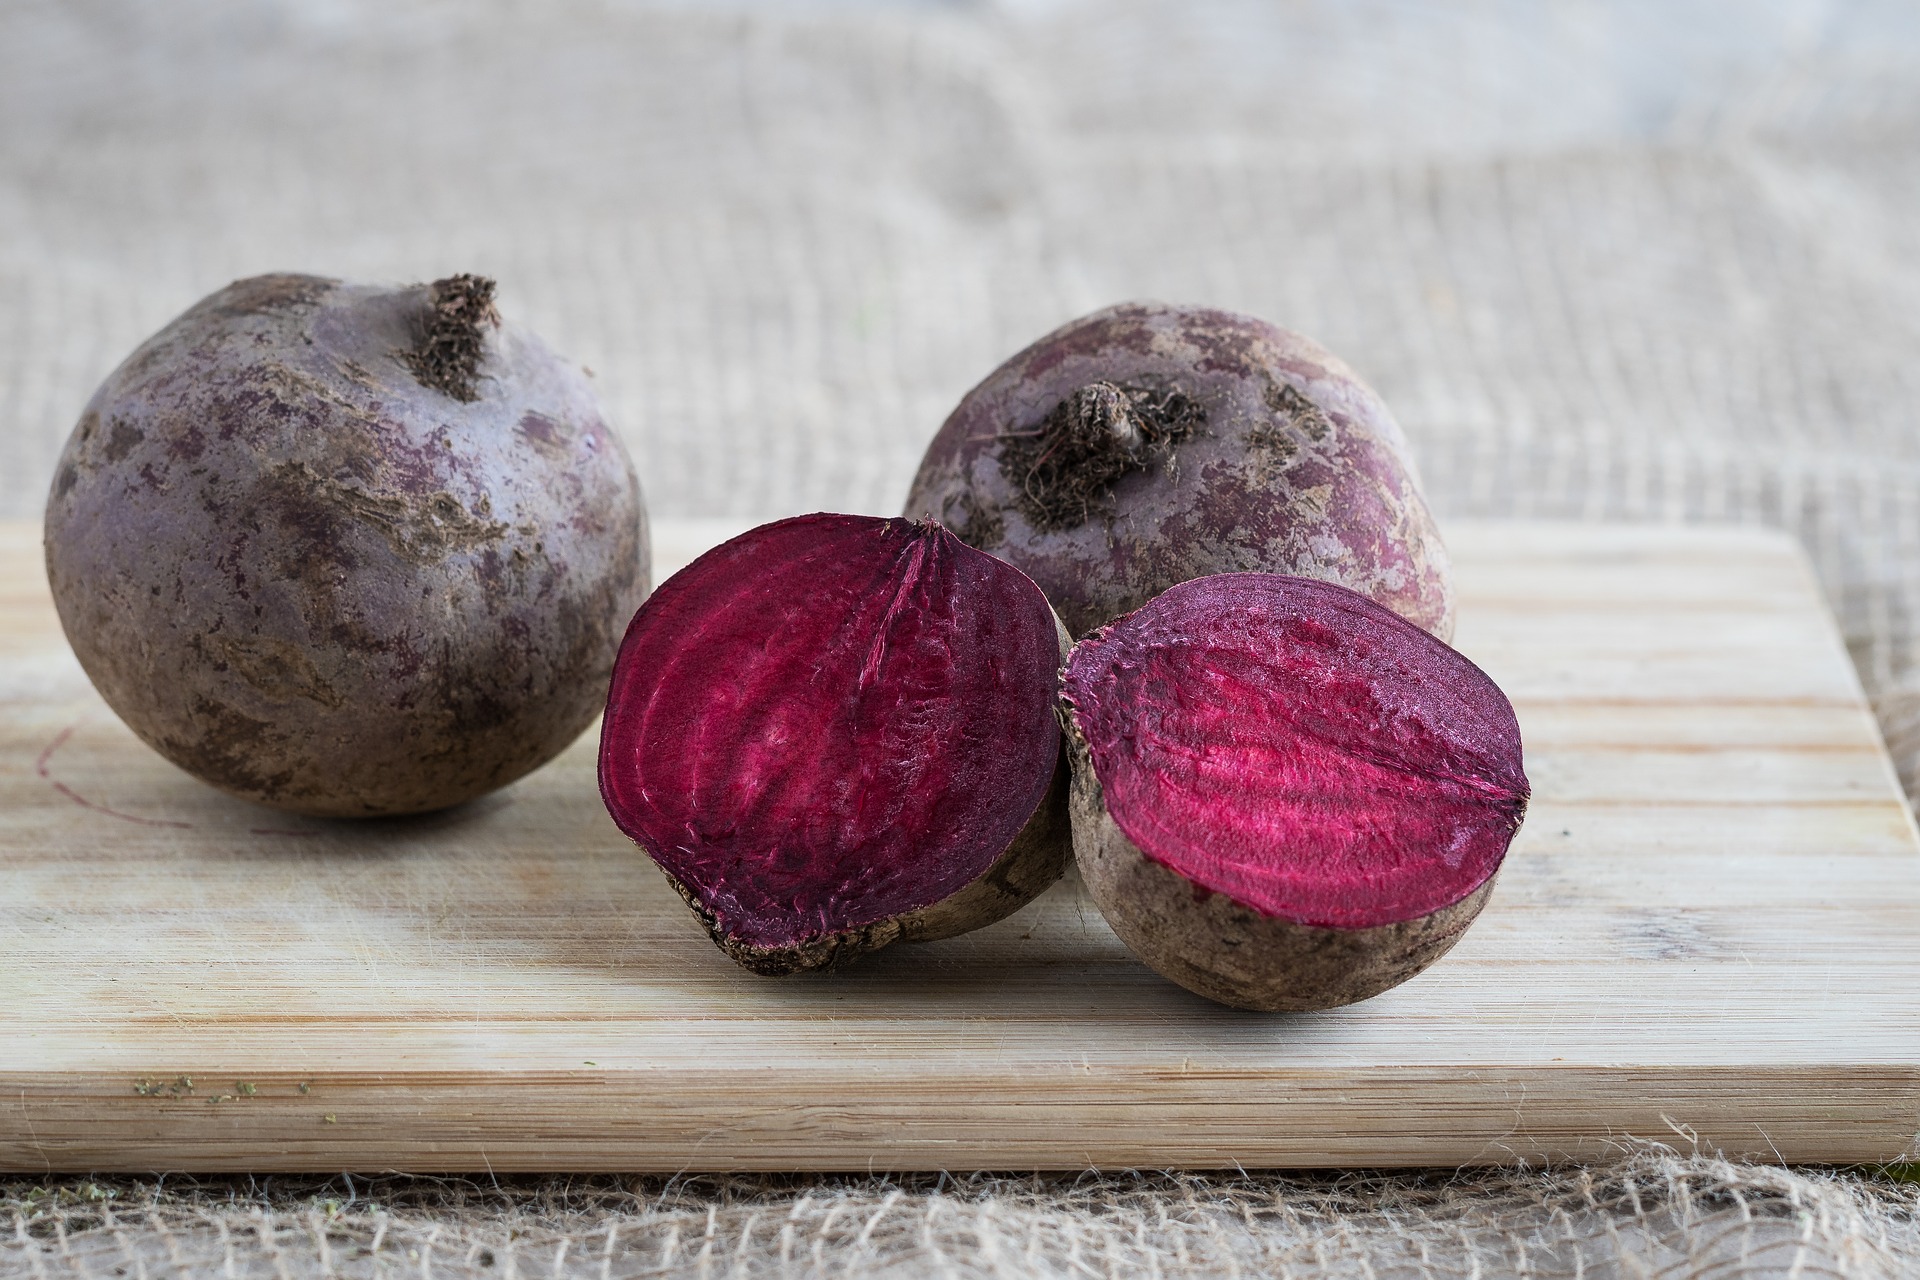
If you're brave enough to handle the cleanup (hint: feed them this before bath time) and are cool with purple poop (yep, beets will discolor their urine and stool), beets are a delicious and healthy food for baby! Learn more about beets here.


ROASTED BEET PUREE makes 10 ounces Directions: Preheat oven to 375 degrees. Wash your hands well with soap and water. Slice off the beet leaves, leaving nothing but the bulbs. Rinse three medium beets under running water and pat dry. Coat beets lightly with oil. Wrap beets in aluminum foil, place on a baking sheet, and roast in the oven until cooked through, approximately 45 minutes. You will know they are done if the beet is easily pierced with a fork. Let cool, then unwrap from the foil, and use your fingers or a vegetable peeler to peel off the beet skin. Chop beets into quarters. Add beets to a food processor and puree until completely smooth, pausing to scrape down the sides of the bowl as needed. You may need to add water, 1 tablespoon at a time, until beets reach a smooth thick consistency.

Storage instructions: Store beet puree in the refrigerator for a maximum of three days or freeze in individual servings for up to three months. Do not refreeze defrosted food.

Roasted Beet Hummus

beetroot-936429_1920.jpg

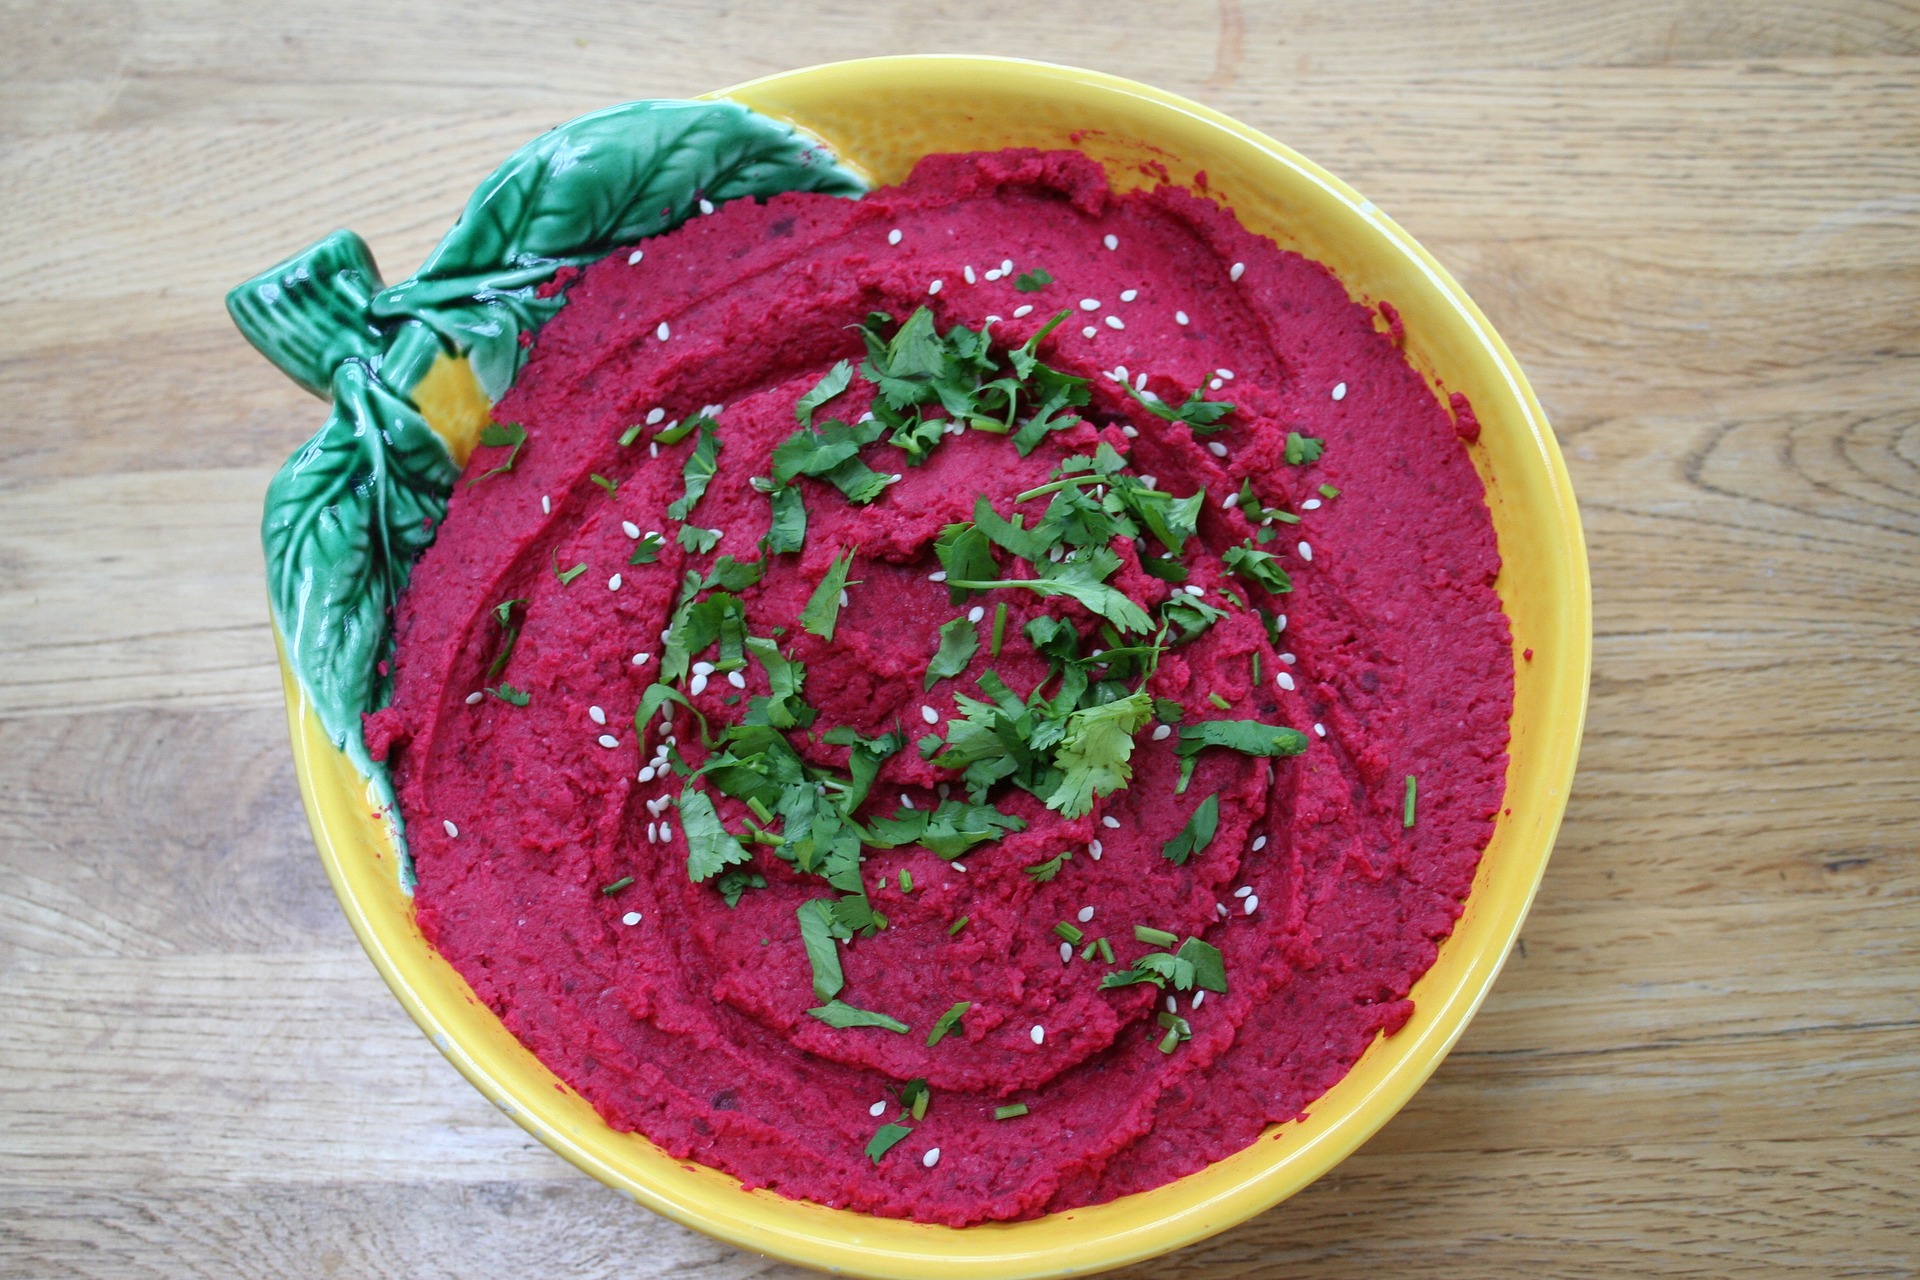
Seriously, does it get more beautiful than this? This recipe, which uses roasted beets in place of traditional chickpeas, makes a show-stopping spread (seriously, what little girl wouldn't love a PURPLE dip?) and is a great use for leftover roasted beets. I love adding this to a crudite platter alongside pita and veggies at a part--it adds a great pop of color

This recipe calls for 1 pound of roasted beets, but if you're starting out with our beet baby food ( Get the recipe here) you'll want to set aside about 1 cup of pureed beets to make this recipe in place of the cooked, roasted beets below. Add the pureed beets and follow the rest of the recipe as is.

Roasted Beet Hummus Ingredients: 1 lb cooked or roasted  beets, quartered  OR 1 1/2 cups beet puree 1/4 cup walnuts, toasted and roughly chopped (optional) 2 tablespoons lemon juice 1/2 tablespoon tahini 1/2 teaspoon ground cumin 1 garlic clove 1 tablespoon olive oil 1/2 teaspoon salt Directions: Place all the ingredients in a food processor and blend until smooth, stopping occasionally to scrape down the sides. Taste throughout and adjust the balance as you see fit. Serve immediately or refrigerate, covered, for up to 3 days. Garnish with sesame seeds and cilantro, if desired.