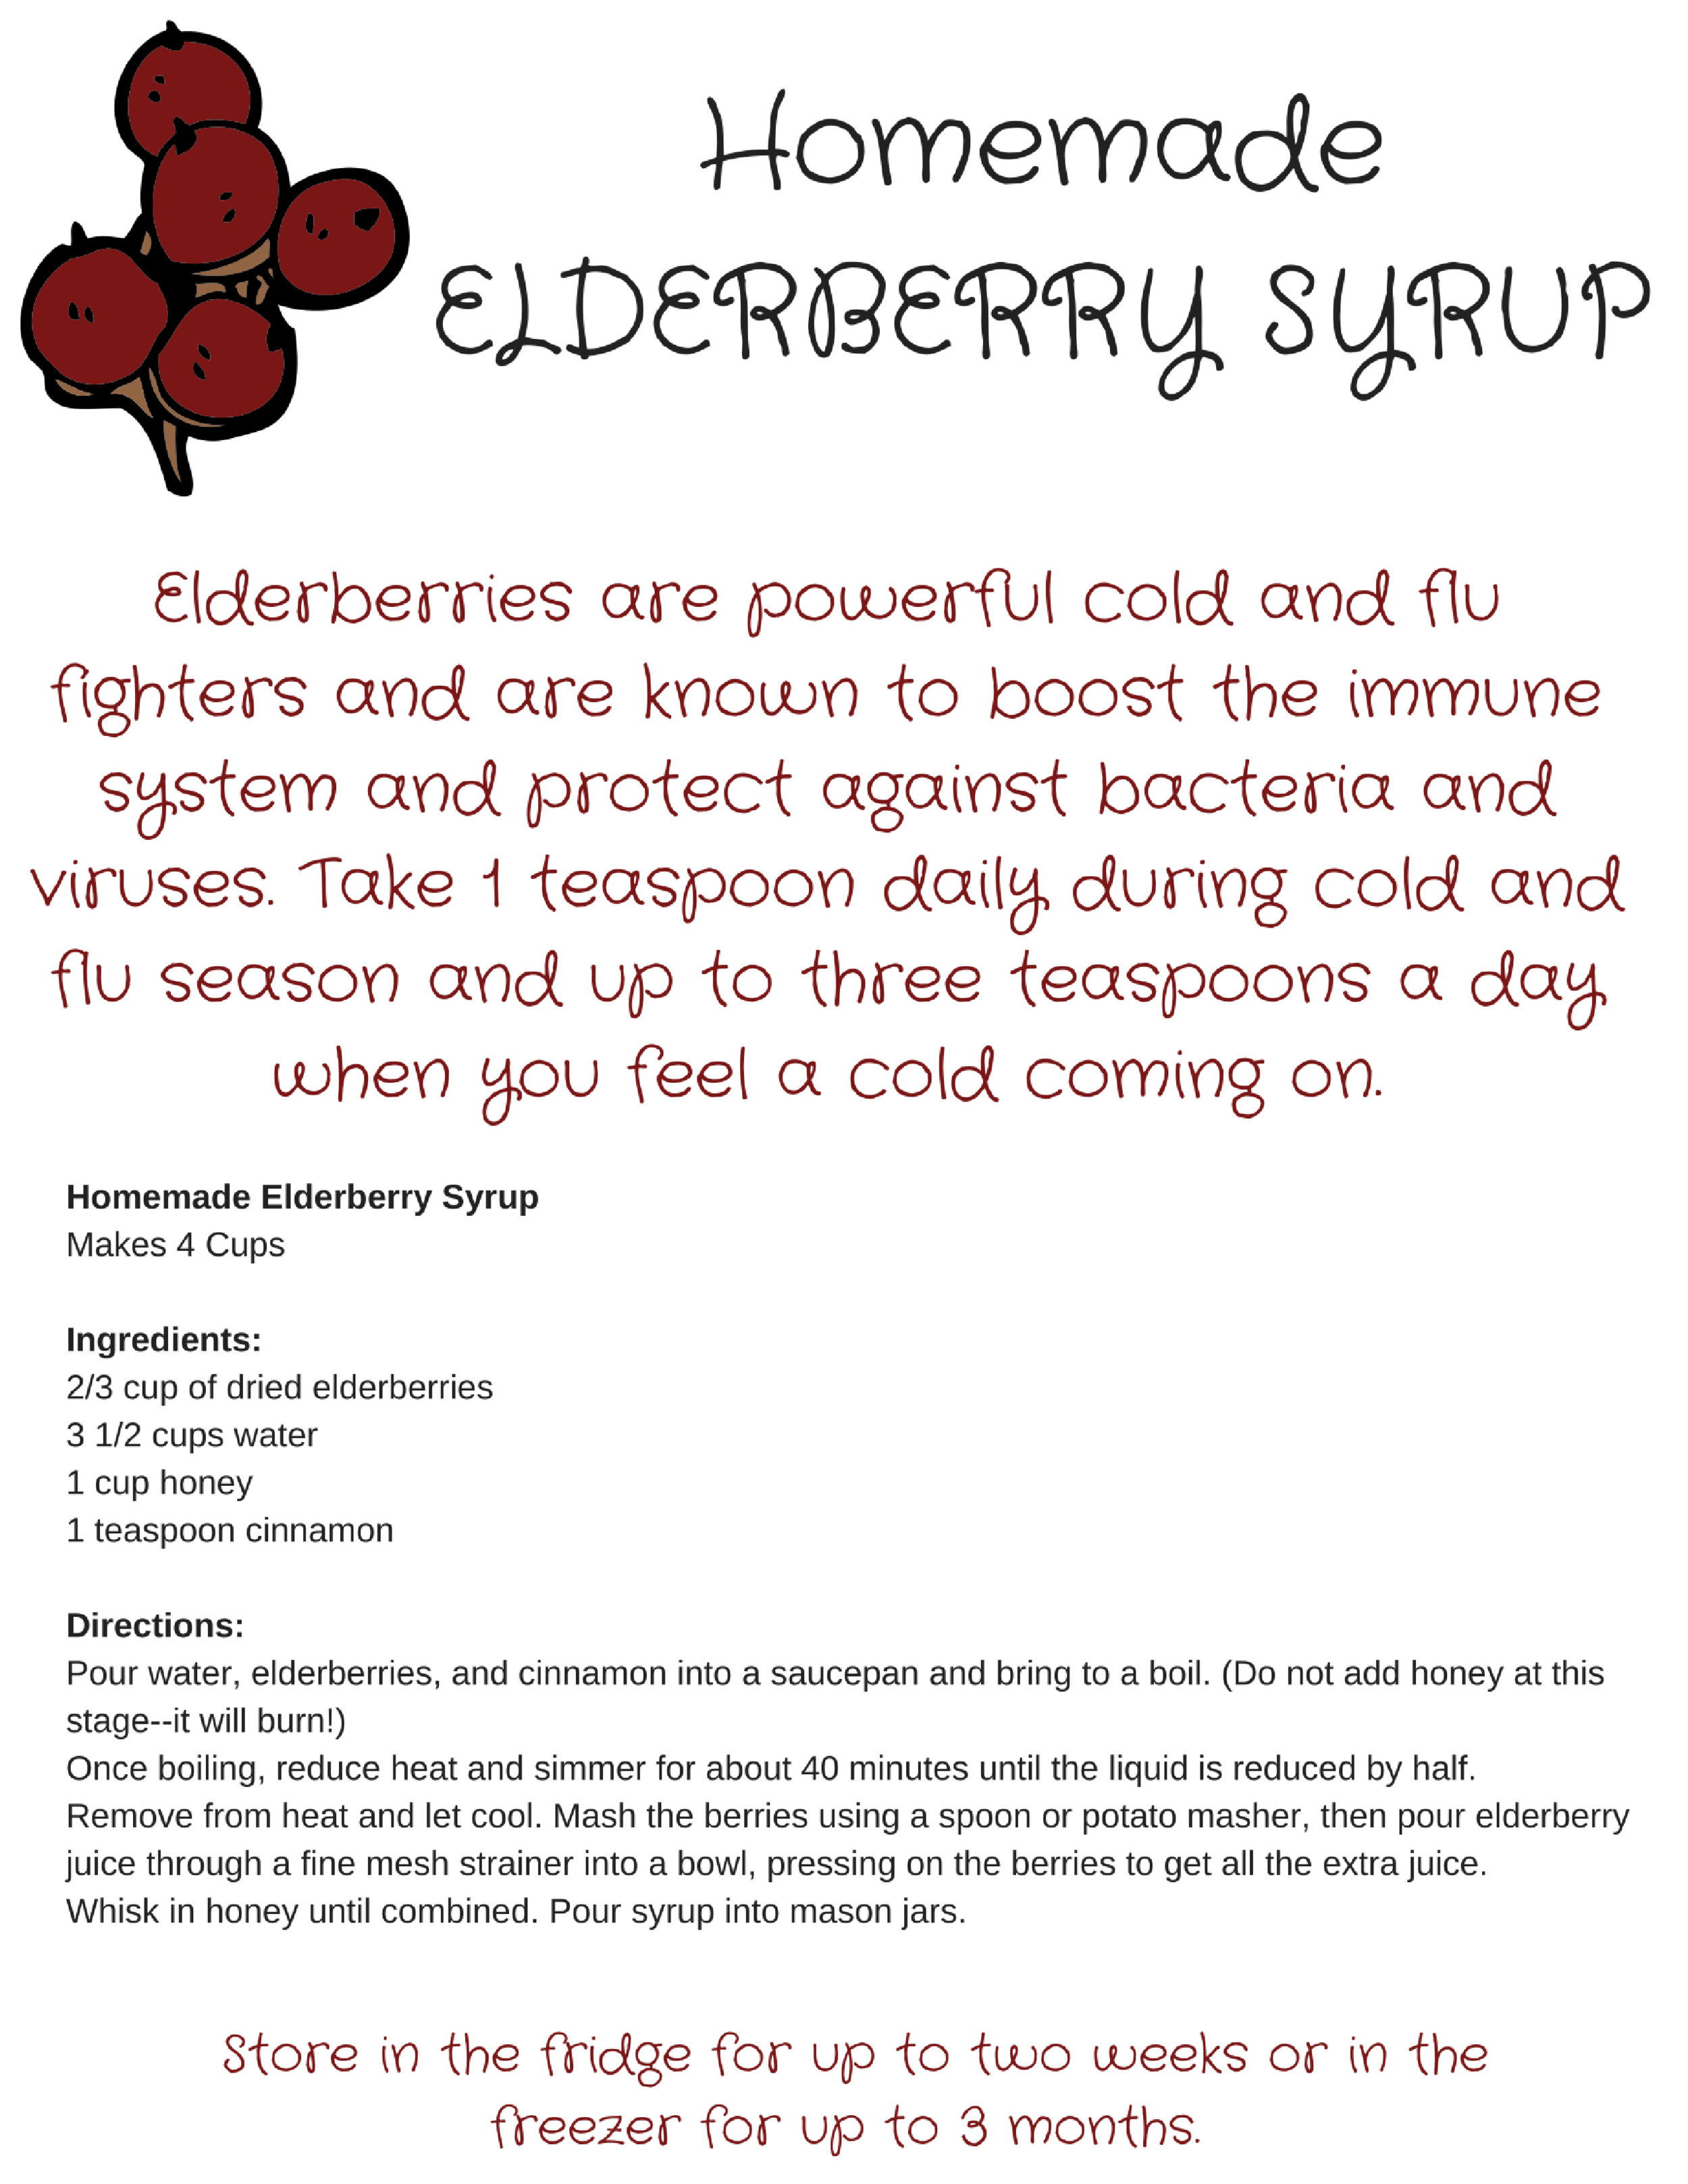
Homemade elderberry syrup--plus downloadable recipe card

FullSizeRender-2.jpg

Welcome to the season of gifting, also known as the season of "What the heck do I give my kid's teachers?" Even more complicated is that most kids in daycare or preschool have like 10 teachers in their classroom (damn you, excellent teacher-studio ratio!) so buying gifts for every.single.one-of-em can add up to another month of tuition. You could do another mug (I'm sure they have NONE of those) or a tray of cookies that they'll secretly curse you for as they eat their feelings over their terribly behaved students (not yours, I'm sure). Or you could do this gift that was inspired by my own son's drop off and seeing kids walk into his classroom with barking sounding coughs and runny noses:

The Ultimate Flu and Cold Fighting Kit.

Its contents include things they'll actually need: items that keep them healthy when they're surrounded by dozens of germy toddlers. Some ideas for a kit can include:

We take elderberry syrup every morning for its potent cold and flu fighting powers. Dried elderberries are known to boost the immune system, and one study even found that elderberry syrup, taken daily, was as good at preventing the flu as the flu shot! That's some powerful stuff. Most naturopaths recommend taking 1 teaspoon a day for adults (or 1/2 teaspoon a day for kids), and then upping that to 2-3 times a day if you feel a cold coming on.

You could easily buy elderberry syrup at your local health food store or online (such as Gaia Herbs Black Elderberry Syrup, 5.4 Ounce), but it's much more cost efficient (and easy enough) to make your own at home. (And if you're looking at multiple teachers), you could make 10 bottles for the cost of 1 bottle that you'd buy at the store.

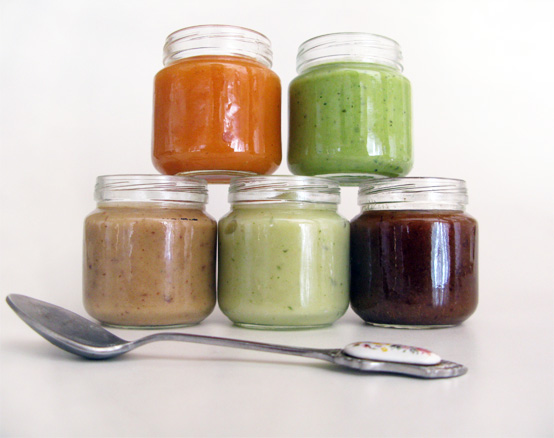
Elderberry syrup will last in the refrigerator for about 2 weeks, but I prefer to freeze in ice cube trays. Because it's a syrup, they don't freeze completely solid, so you can scoop out a half a cube each morning. I add them to my kids' smoothies or orange juice and I take mine straight from the spoon. For teachers, you could place syrup in small mason jars and include the downloadable file to include in your kit (scroll down to the end of the post to view).

Important Note: Because this homemade elderberry syrup contains honey, it should not be given to babies under age 1!

RECIPE: Homemade Elderberry Syrup Makes 4 Cups

Ingredients: 2/3 cup of dried elderberries. These are hard to find in store so we buy this brand on Amazon:  Viva Labs Organic Elderberries, 1 lb Bag - The ULTIMATE Superfruit for Defense Syrups and Longevity Teas

3 1/2 cups water

1 cup honey such as Nature Nate's 100% Pure, Raw and Unfiltered Honey, 32 Ounce

1 teaspoon cinnamon

Directions:

Pour water, elderberries, and cinnamon into a saucepan and bring to a boil. (Do not add honey at this stage--it will burn!)

Once boiling, reduce heat and simmer for about 40 minutes until the liquid is reduced by half.

Remove from heat and let cool. Mash the berries using a spoon or potato masher, then pour elderberry juice through a fine mesh strainer into a bowl, pressing on the berries to get all the extra juice.

Whisk in honey until combined. Pour syrup into mason jars and store in the fridge for up to two weeks or in the freezer for up to 3 months.

elderberry-syrup


30+ (Healthy!) First Finger Food Ideas

child-1528308_1920.jpg

  Finger foods are your baby's first step in the transition to table food—and let's face it: Without the need to spoon feed, you now have two hands free during meal time (score!). But many packaged finger foods that are made specifically for this toddler stage are loaded with salt and sugar, according to a recent study. Ugh! Step away from the teething crackers and pick up these nutrient- and flavor-packed choices:

FRUIT AND VEGGIES! {veggies} - steamed cut up carrots - frozen mixed veggies, defrosted - steamed chopped broccoli or cauliflower - cut cooked green beans - diced cooked squash or sweet potato - diced steamed zucchini or summer squash

{fruit} - halved blueberries - avocado chunks rolled in wheat germ or ground flaxseed for easier pickup - banana slices rolled in wheat germ or ground flaxseed for easier pickup - small chunks of peaches, plums or mango - small dices of melon - steamed apple or pear dices

HIGH PROTEIN OPTIONS {beans (when buying canned, go for organic or low sodium, and always rinse)} - small white beans - cooked lentils - black beans - small pink beans {meat, fish, and eggs} -scrambled eggs cooked in butter - flaked salmon - shredded chicken - cut up meatballs {misc.} - tofu cubes - shredded cheese or cheese cubes

HEALTHY CARBOHYDRATES - homemade muffins, cut up - frozen whole wheat bagel (great for teething!) - cheerios or other whole grain no-sugar-added cereal - cooked whole grain pasta (top with tomato sauce or a veggie puree) - plain waffles or pancakes, cut up


6 Things You Might Not Know About Jarred Baby Food

puree-buffet.jpg

One of the most common questions I get asked about baby food is this: “Why should I make my own? Isn’t jarred food the same thing?” The truth is that while the ingredients might read the same as what you’d use to make at home (like carrots and water, for example), there are many major differences that aren’t always so noticeable. These five truths about jarred baby food are truly shocking.

  1. The baby food you’ve purchased may have been sitting on the shelf since before you were even pregnant. The expiration date of jarred baby food is often years away, and to enable that shelf life, jarred baby food is cooked at extremely high temperatures—a process that removes many of the nutrients.
  1. Jarred baby food doesn’t actually taste like what it claims to be. Do this test at home: Remove the label from the jar, and do a taste test to guess what vegetable or fruit you’re eating. Tough, right? That’s because the high temperature processing affects the flavor and texture of the food, making it difficult to differentiate the food by taste alone. As a parent whose goal is to get my kids to eat a diet full of fruits and veggies, giving them a taste of what fruits and veggies really taste like is crucial to start them off on the right track.
  1. Additives are often present. You’ll often see ascorbic or citric acid on the ingredient list of organic and conventional baby foods. When the jars are heated to high temperatures to preserve shelf life, it results in a loss of vitamins and nutrients in the food. To combat this, baby food companies add in artificial forms of vitamin C that come in the names of ascorbic or citric acid so the jars aren’t totally devoid of the nutrients they’re supposed to naturally contain.
  2. BPA is used in many brands to coat the lids of jarred baby food. Metal lids can contain Bisphenol A, which is especially dangerous to infants whose immune systems are weaker and less able to rid the body of toxins. A study published in Environmental Health Perspectives found that widespread exposure to BPA may result in levels of up to 11 times higher in infants than in adults.
  3. They’re sneaky about sugar. Just because an ingredient label doesn’t read “sugar” doesn’t mean it’s not there. Look for sneaky sources of sugar including any sort of “juice concentrate” which are often added to sweeten up mixed fruit and veggie pouches and jars—even ones labeled as “natural”. Other sneaky sugar sources to seek out: fructose, malt extract, any type of syrup, or any ingredient ending in “ose” like fructose.
  4. They're swimming in pesticides. A recent study of jarred baby food found that one measly jar of peaches contained 22 varieties of pesticides! Apples, pears, and green beans also contained more pesticides per jar than would legally be allowed on the shelves of European grocery stores. (American companies aren’t required to follow strict regulations.)

The bottom line is that when you buy food from a store shelf, it’s impossible to know everything that goes into it, and making your own baby food (and using organic fruits and veggies when available), is THE BEST WAY TO know exactly what’s going into your baby’s belly.


Mini Stuffing Bites

stuffing-bites.jpg

Why, I ask you, is stuffing limited only to Thanksgiving? This post is my plea to make Thanksgiving's best side dish extend throughout the winter. It's the ultimate comfort food--and this version redeems itself by containing also veggies and a fruit (and, ahem, sausage and butter).  I love these bite sized versions for many reasons:

  1. It's a universal rule that applies to 99 percent of kids across America: Bake anything in a muffin tin, and they're more likely to try it.
  2. These can can be made ahead and even stored in the freezer, so you can pop one out anytime—they make a great addition to your child's lunch boxes, or as a size to any meat-based dinner, or as an adorable party appetizer.
  3. Portion control. If you're the type that will go at the leftover stuffing with a spoon and without a stop button (insert self), these smaller versions can help reign it in.

Mini Sausage and Apple Stuffing Bites

Makes 24 Muffin Size Bites

Ingredients: 1 baguette cut into 1-inch cubes, about 8 cups 1 tablespoon butter 2 tablespoons olive oil 2 sausage links, castings removed (or 1 cup ground sausage) 2 apples, chopped 1 small yellow onion, diced, about 1 cup 4 celery stalks, diced, about 3/4 cup 2 teaspoon minced fresh thyme 2 cups organic low sodium chicken stock 3 large eggs, beaten ½ cup dried cranberries, optional

Directions: Preheat oven to 350 degrees. Grease 2 muffin tins or line with parchment liners. Set aside Place bread cubes onto cookie sheet, and cook in the oven for 8-10 minutes until toasted. In a large skillet over medium heat, sauté sausage in butter and oil until cooked through, about 5-7 minutes. Add apples, onions, celery, and thyme and sauté for 8-10 minutes more, until onion is translucent and celery is soft.  Remove from heat. In a large mixing bowl, stir together sautéed ingredients, bread cubes, chicken stock, eggs, and cranberries and toss to thoroughly combine. Spoon the stuffing mixture into greased muffin tins, filling all the way to the top. Pat the mixture down to pack it well. Bake for 25 minutes until bites are golden. Serve warm or at room temperature.

Pasta with Butternut Squash Sauce

IMG_3604.jpg

I know you've got strong biceps from carrying that baby around all day. Or from lugging all the things that your toddler refuses to carry. You'll need those muscles to cut through a butternut squash! But if you're not feeling up for the challenge, here area few shortcuts:

      1. The most economical way to purchase a squash is to buy them whole, so if you're chopping the whole darn thing, here's the simplest way to cut through it: Cut the squash in half lengthwise, scoop out the seeds, peel with a vegetable peeler, then chop into pieces. But here's a hint to make it even easier. With a fork, poke 10 deep holes into the squash, then throw it in a microwave for 5 minutes before cutting through. Thank me later.
      2. Buy it pre chopped--fresh or frozen. The lazy woman's choice (and often mine--I don't judge.)

If you have a picky eater, this is a great recipe that introduces him to something new (squash sauce), but also has familiar elements (spaghetti), and that familiarity ups the chances that they'll try it without some sort of epic meltdown. Win!

Pasta with Butternut Squash Sauce

Makes 6 adult servings

Ingredients: 3 tablespoons organic unsalted butter 8 fresh sage  leaves, finely chopped 1 yellow onion, chopped 2 garlic cloves, chopped 2.5-lb. butternut squash, peeled, seeded, cut into ½” pieces OR 3 cups of butternut squash puree 2 cups organic low-sodium chicken broth ½ cup grated parmesan cheese salt and pepper 1 box whole wheat spaghetti

Directions: 1. Heat butter in a large deep skillet over medium heat. Add sage, onion, and garlic, and sauté until onion is translucent, around 8-10 minutes. Add butternut squash and broth. Bring to a boil; reduce heat, cover and simmer until squash is fork tender, around 15 minutes. Puree mixture using a food processor or immersion blender (Careful: The mixture will be hot). Return to original skillet and stir in cheese. Season to taste with salt and pepper. 2. Cook pasta in a large pot of salted boiling water until just al-dente (or about 2 minutes less than the suggested cooking time). Transfer pasta and 1 cup of pasta water to squash mixture and cook over medium heat for 2 minutes more, tossing so that the pasta is completely mixed with the puree. Add more pasta water as needed. Serve immediately.

Slow Cooker Applesauce

dreamstime_m_45645993.jpg

Nothing makes the house smell quite like fall than the smell of cinnamon and apples slowly cooking all afternoon. I admit that I'm not one that often pulls out my slow cooker. Most of the good recipes I find require too many steps that, for me, eliminate the convince factor of using a slow cooker at all: searing meat and sautéing veggies before adding them to the pot. But this is worth my pulling out the heavy appliance, mainly because this recipe is a one step wonder: Just throw everything in, set it on high for four hours, and let the apples break down slowly to fill your house cinnamon-sweet smells.

From there, my four year old loves the job of official apple masher. I give him a potato masher and let him get to work! (makes 4 cups)

Directions:
Combine the following ingredients in a slow cooker: 3 pounds of apples, peeled, cored, and chopped into 1 inch pieces; 2 cinnamon sticks; 1 tablespoon lemon juice; 1/2 cup water; 1/4 cup pure maple syrup (optional). Cook on high for 4 hours, stirring once or twice. Remove the cinnamon sticks, then use an immersion blender or potato masher to puree the applesauce. Store in the refrigerator for up to 4 days or freeze for up to 3 months.