blog-posts.jpg

5 Ways to Get Your Kids to Eat Healthier This Week

child-1242720_1920.jpg

If your summer is looking anything like mine, it’s filled with ice cream trucks, pizza nights, and treats at grandma’s house/the pool/the beach.My sneaky kids have gone so far as to befriend all the regulars on our beach who come with bags packed with Oreos. They then make their best puppy dog eyes and say, "I've never had an Oreo before." Works every weekend. Healthy summertime eating can sometimes feel like a lost cause. But these quick strategies steer 'em back on track and are so easy to implement. Follow them to make your whole family healthier right away.

1. Ask your child to wash a vegetable. Pull a step stool up to your sink, and give your child the “job” of rinsing off the vegetable that you’re serving. While a common goal for parents is to get their kids to actually eat more vegetables, all types of exposures count--even holding a veggie in their hand. Kids are natural explorers, so letting them grab hold of a veggie exposes their senses to something new in a completely non-intimidating way.

2. Eat dinner under your kitchen table. Or have your kids pick any place you can spread a picnic blanket: over the sandbox, atop their playground—anything works. Remember, this strategy isn’t for pizza night—serve something healthier that you want them to try. Changing up the location makes dinnertime less of chore for children than having to sit at the table, which translates into more of a chance that they’ll eat what’s in front of them.

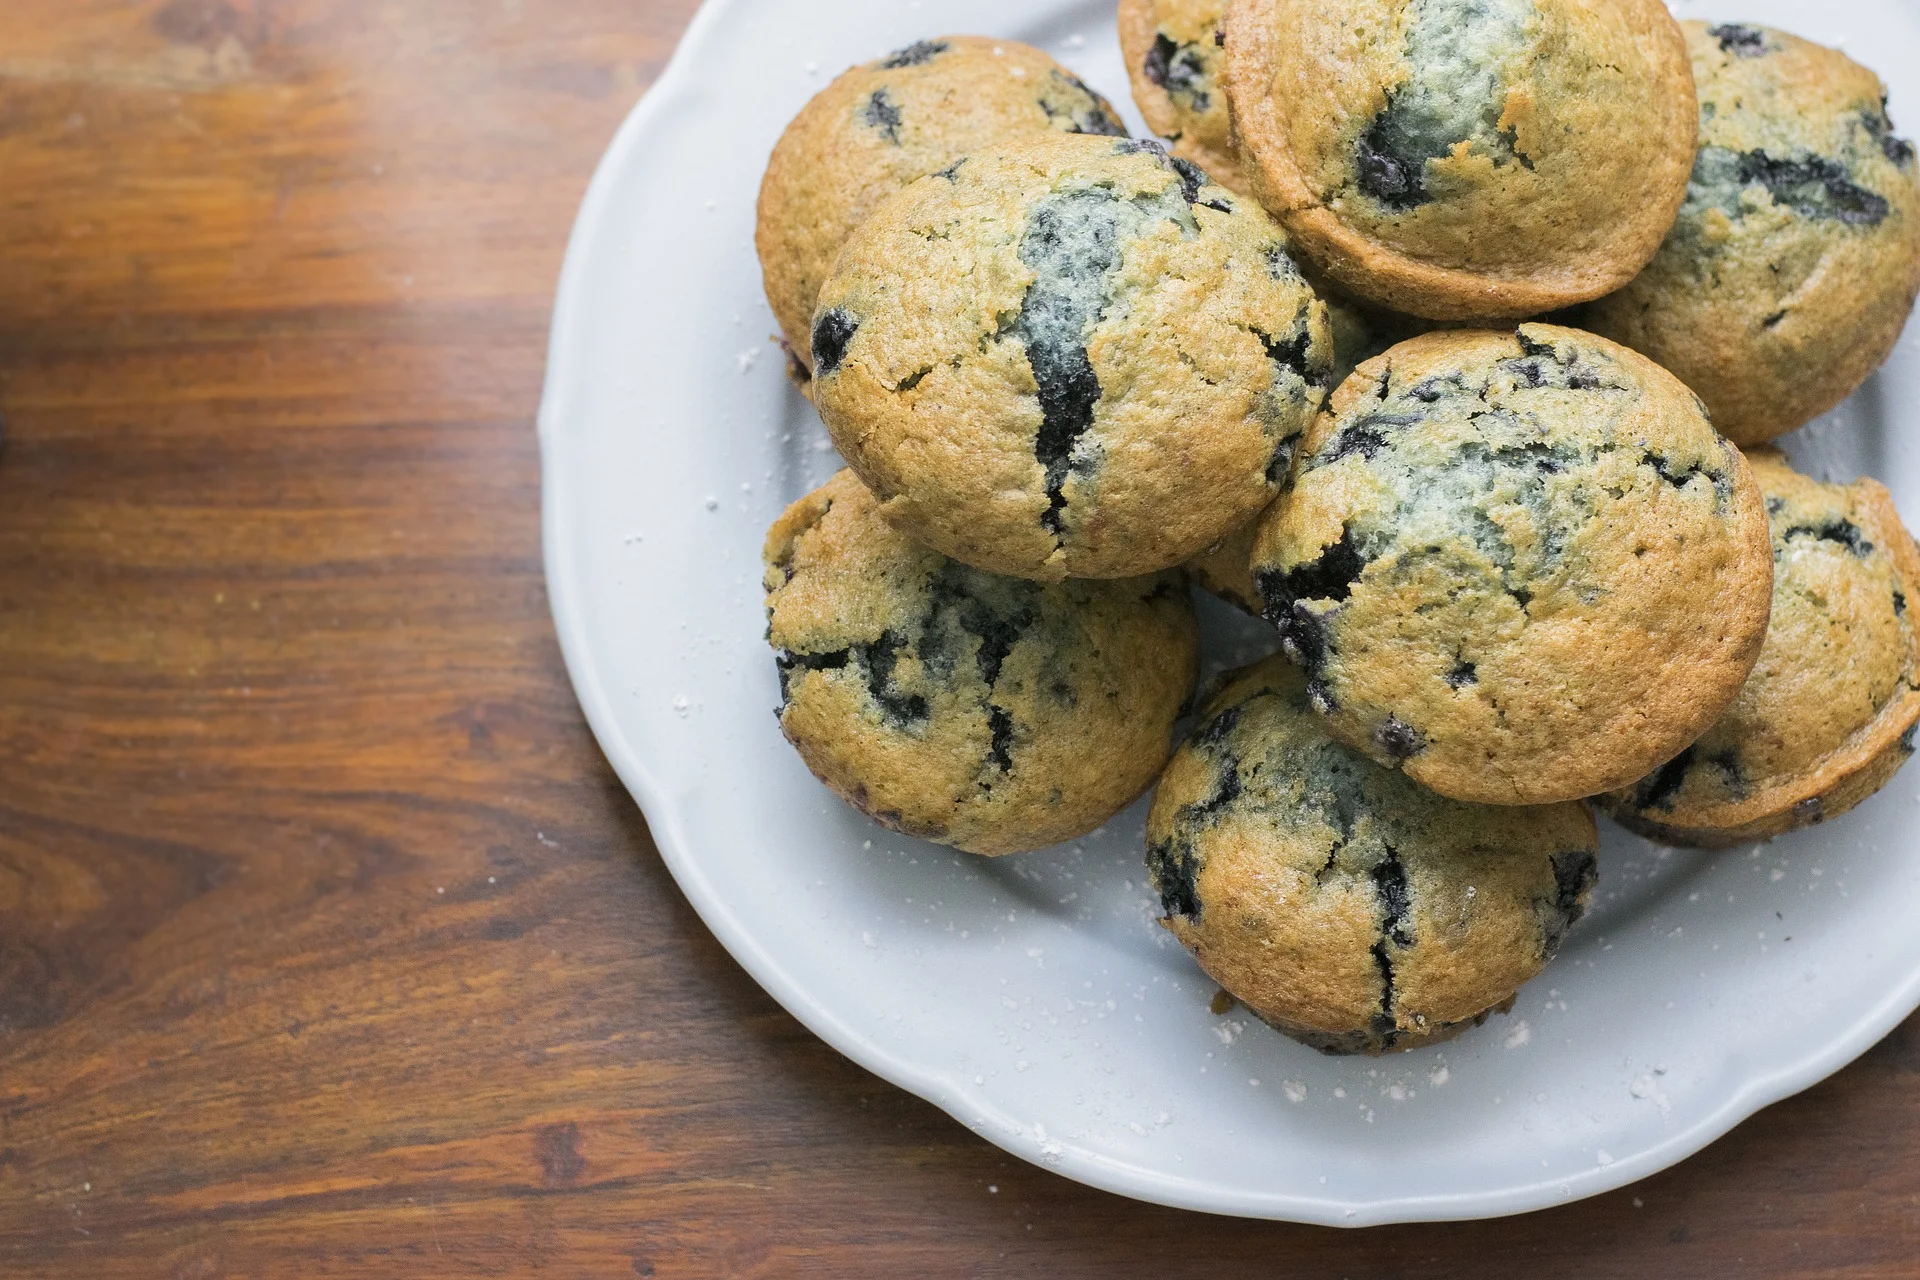
3. Replace one of your go-to snacks with something homemade. 99 out of 100 times, the snacks you make yourself are healthier than anything you buy in a package. Instead of a store-brought granola bar, make these sweet spinach muffins or healthier blueberry muffins. Compared to packaged stuff, homemade snacks contain way fewer ingredients, an ingredient list you can pronounce, and no preservatives or artificial anything. That’s always a step in the right direction.

4. Put out a veggie tray after camp after the park. Add a mix of chopped veggies, like baby carrots, cucumbers, celery, pepper slices and a dip like hummus or ranch dressing. When kids are starving, they eat what’s in front of them. We do this about 30 minutes before dinnertime, and it works every time.

5. Count colors. Hang six pieces of construction paper on a wall or your door in these colors: green, orange, red, blue, yellow, purple.  Tell your kids that your goal for the day is to eat as many of these colors as they can—whoever gets the most colors at the end of the week wins. And no, rainbow sprinkles don’t count :)

How to pick the healthiest granola bar

food-2202344_1920.jpg

Children loves granola bars, but many brands you'll find on the shelves contain as much sugar as candy bar! But healthy packaged ones do exist, and they're a great snack to have on the road or on those days that you simply don´t have time to make your own. When I buy granola bars at the grocery store, I look for these numbers on the nutrition panel:Calories: around 150 Sugar: less than 10 gram Fiber: more than 3 grams

Here's a list of my favorite granola bars that I feel good about giving to my kids.

Made good granola bars. A great choice for the school or camp since they are nut free and free from the most common allergens. They come in 4 delicious flavors AND are made with vegetables. 1 bar has 7 grams of sugar and 90 calories which is a good snack size especially for toddlers and prek aged kids.

Junkless Chewy Granola Bar: All four flavors are made with fewer than 8 ingredients, which is a refreshing shift from the lines of unpronounceable ingredients often found in store-bought bars. Our two favorite flavors are Cinnamon Roll and Chocolate Chip.

Cascadian Farms Organic, Oatmeal raisin granola bar. Lower in sugar than their other flavors with only 7g of sugar and 80 calories, this is also a great option for toddlers.

Kashi Chewy Granola Bar in Trail Mix Flavor. This contains nuts, so while it might not be a good option for school or the park, it's a great snack for safe environments and contains a filling 3g fiber.

Kind Cinnamon Oat Bars. Not all Kind Bars are low in sugar and nut-free, but these are, which make them a great choice for school. With only 5g of sugar and 2g of fiber, these are a healthy and filling choice.

Lära bars. Made exclusively with dried fruit and nuts (so not school friendly), these are high in good fats and natural sugars from the fruit. I have my kids split a bar.

15 Convenient Snacks that We Love

snack-1284230_1920.jpg

If time was never an issue and groceries magically appeared in our fridge, our kids would live on a diet of all homemade food all the time, but in reality, we do a mix of fresh foods, homemade snacks, and packaged ones. Here are our go-tos: 1. Organic popcorn

2. Sliced veggies like red peppers, cucumbers, and baby carrots with mini to-go hummus. These don't require refrigeration--perfect for on-the-go.

3. Homemade muffins, like these healthier blueberry muffins or kid-approved zucchini muffins.

4. Store brought granola bars: Check out our post on our favorite granola bars!

5. Apple slices with peanut butter or sunbutter

6. Applesauce pouches.Look for ones that have apples and water as the only ingredients and steer clear of ones that have fruit concentrates (another word for added sugar). We do Mott's Unsweetened Applesauce .

7. Yogurt sticks. We love the Siggis brand for being low in sugar and high in protein. The kids love these frozen.

8. A bowl of cereal with milk. Check our our post on our picks for the healthiest cereals

9. Mini whole wheat bagels with cream cheese or peanut butter

10. Cheese and crackers

11. String cheese. Our kids love the new character string cheese (and often fight over whether I should buy Spiderman or Paw Patrol!)

12. Whole fruit--apples, bananas, peaches, plums. They're so portable and can stay for a day or two in your purse or in your car.

13. Chopped fruit, like watermelon, cantaloupe, and raspberries and blueberries, which double as a hydration for hot summer days.

14.Harvest Snaps Pea Crisps. The kids LOVE these, and I love how they have natural protein from the peas.

15. Homemade trail mix. We make ours nut free with Cheerios, raisins, chocolate chips, and sunflower seeds.

Easy peasy peach salsa

mango-1467281_1920.jpg

Delicious when peaches are in season and when they're not (buy frozen slices), this salsa is delicious served with fresh pita chips or as a tropical topping for grilled fish, chicken, or tacos. Add a scoop to your toddler's high chair for a fun and colorful finger food. It's a crowd pleaser! Plus, peaches pack a nutritious punch. Click here to read all about the health benefits of peaches, plus the best ways to pick 'em and store 'em!

Easy Peasy Peach Salsa Ingredients 1 pound tomatoes, diced 1 bell pepper, seeded and finely diced 2 jalapenos, seeded and finely diced (optional) 1 medium red onion, finely diced 1½ pounds peaches, diced * ½ bunch cilantro, chopped 2 Tbsp. lime juice 1½ tsp salt, or to taste ¼ tsp freshly ground black pepper or to taste Directions: Combine all ingredients in a bowl and refrigerate for at least a half hour (or up to 2 days) to allow the flavors to develop.

*I liked the slightly larger dice for peaches to give them more of the center stage in this salsa. No need to peel them. You won't notice the peels and the color is prettier with the peel on.

Peach Baby Food Puree

nectarine-1074997_1920.jpg

Ages: 6 months+ Technique: Blanching. Check out cooking guide to learn which other fruits require this method of cooking.

Turn it into: A champagne floater for your next moms brunch. Add 1 tablespoon of peach puree to each glass of champagne.

Peaches make a delicious and healthy first food for babies and can be introduced when your doctor gives you the okay to start solids. Fresh ripe peaches that have been peeled and cubed also make a good finger food for toddlers or for baby led weaning.

Nutrition profile: Peaches contain vitamins A and C, and are rich in many vital minerals such as potassium, fluoride, and iron. They also contain the antioxidant lutein, zeaxanthin, and ß-cryptoxanthin that protect the body from free radicals. Get more info on how to buy and store peaches by clicking here. .

PEACH PUREE makes 6-8 ounces Directions: Wash your hands well with soap and water. Rinse two medium ripe organic peaches under running water. Place peaches on a cutting board and use a paring knife to slice an X through the base of each peach. Meanwhile, bring water to a rolling boil in a medium saucepan. Use a slotted spoon to add the whole peaches to the water and boil for 2 minutes. Carefully remove peaches using a slotted spoon, and transfer peaches to a bowl filled with ice water. Let cool for two minutes in the ice bath, then use your fingers or a paring knife to peel off the skin, using the X as a starting point. Discard the skin. Slice peaches using a paring knife and working your way around the pit. Discard the pit, and place the cut fruit in a food processor. Puree until completely smooth.

Storage instructions: Store peach puree in the refrigerator for a maximum of three days or freeze in individual servings for up to three months. Do not refreeze defrosted food.

Peas Baby Food Puree

peas-2686_1920.jpg

Peas baby food puree

Ages: 6 months+

Technique: Boiling. Check out our cooking guide to learn which other vegetables require this method of cooking.

Turn it into: Pea and Mint Guacamole GET THE RECIPE HERE

It's no secret that peas are our favorite vegetable (it's part of our name for peas-sake!). One of the only vegetables that's high in protein, pea puree makes a great first food for babies and plain old defrosted peas make a great finger food for toddlers (and a way healthier alternative to processed finger foods). Read more about our love for peas HERE. 


PEA puree

Makes approximately 20 ounces

Ingredients

1 10-ounce bag of frozen peas

1/2  cup water

Directions:

Pour water into a saucepan and bring to a boil. Add peas to the saucepan and boil for two minutes.

Using a slotted spoon, carefully transfer peas to a food processor, adding cooking liquid a little at a time until peas are smooth.

Store in the refrigerator for up to three days or freeze purees in individual serving containers and freeze, covered, for up to three months. Do not refreeze defrosted food


Storage instructions: Store pea puree in the refrigerator for a maximum of three days or freeze in individual servings for up to three months. Do not refreeze defrosted food.

Butternut Squash Baby Food Puree

butternut-74196_640.jpg

Ages: 6 months+ Technique: Roasting. Check out our cooking guide to learn which other vegetables require this method of cooking.

Turn it into: Butternut squash soup  GET THE RECIPE FOR BUTTERNUT SQUASH SOUP HERE OR Pasta with butternut squash sauce GET THE RECIPE FOR PASTA WITH BUTTERNUT SQUASH SAUCE HERE


With its sweet taste and easy-to-digest profile, squash makes an ideal first food for your baby.  The vegetable is also an excellent source of vitamin C, a nutrient that strengthens the immune system and protects the body against infections.


BUTTERNUT SQUASH puree

Makes approximately 24 ounces

Ingredients:

1 medium butternut squash

water

Directions:

Preheat the oven to 375 degrees. Line a baking sheet with parchment paper, then fill the baking sheet with water until the water fills 1/4 up the sides of the sheet.

Use a large sharp knife to halve the squash lengthwise, then use a spoon to remove the seeds. Place squash halves face down in a baking pan.

Bake for approximately 40 minutes to 1 hour. Skin should be puckery and/or wrinkled and squash should feel soft when pressed. Scrape out the squash and then puree to creamy consistency. Add water if needed.

Storage instructions: Store squash puree in the refrigerator for a maximum of three days or freeze in individual servings for up to three months. Do not refreeze defrosted food.

Overnight oats (3 ways!)

IMG_0104-e1498499693420.jpg

In an confusing twist of events that's beyond all adult understanding, my 5-year-old decided he likes oatmeal. This ill-timed conclusion occurred once the weather settled in at a steady 80 degrees, and around the same day I decided to forgo all hot breakfasts--especially ones (ahem, oatmeal), I'd been trying to get him to eat all winter long. Oh the irony! But when a picky 5-year-old decides he likes something, you make it. Enter these overnight oats. They're so refreshing, can be prepared in advance, and are endless in their flavor possibilities. All it takes is a little advanced planning--overnight oats can be made 1-3 nights before you're ready to eat them so I usually make a bunch of individual servings in mason jars or tupperware (any lidded container will do), and we eat them throughout the week. You can substitute regular milk for coconut milk, almond milk, or whatever, and topping possibilities can include granola, nuts, seeds, shredded coconut, or fruit. And that bit of advanced planning makes mornings so much easier. Just stick in a spoon and breakfast is done.

Here are my three go-to versions. All recipes are for individual servings, but you could also quadruple the recipe make a big bowl, cover it with plastic, then scoop out as much as you'd like. I also love serving these for breakfast when staying with a big group. So much easier than frying up eggs or pancakes in the morning!

MANGO COCONUT OVERNIGHT OATS (pictured) Combine 1/2 cup rolled oats, 1/2 cup coconut milk, 1/2 cup plain yogurt, and 1 tsp honey. Stir together. Top with 1 tablespoon unsweetened flaked coconut and 1/2 cup mango chunks (I use frozen). Cover and refrigerate overnight or for up to 3 days.

MIXED BERRY OVERNIGHT OATS Combine 1/2 cup rolled oats, 1/2 cup almond milk, 1/2 cup plain yogurt, a pinch of cinnamon, and 1 tsp honey or maple syrup. Stir together. Top with 1 tablespoon each ground flaxseed, sliced almonds (optional) and 1/2 cup mixed berries. Cover and refrigerate overnight or for up to 3 days.

CHOCOLATE BANANA OVERNIGHT OATS Note: Since bananas will brown, we stir this all together and add cocoa powder to disguise the color change). Mash 1/2 of a banana, then stir in 1/2 cup rolled oats, 1/2 cup milk, 1/2 cup plain yogurt, 2 teaspoons cocoa powder and 1 tsp honey. Cover and refrigerate overnight or for up to 3 days.

No-fuss gazpacho soup

GAZPACHO-e1498500135310.jpg

If you dislike cooking, you are going to love this. If you're outside roasting on this sticky 90 degree day, you are going to love this.

If you like recipes that can be prepped and on the table in less than five minutes, you are going to love this.

If you like the idea of your child eating vegetables and if you like vegetables in their purest, most-refreshing form, then you are going to really really love this.

Because unlike many gazpacho recipes that require blanching tomatoes, peeling cucumbers, and straining the finished product, this is the no-fuss (read: no work) version. All we do is blend up veggies with little else, and the result is something so refreshing, so delicious, and so impossible to screw up (I'm looking at you, so-called non-cooks).

Best of all, my kids eat this up AND love helping with the prep. My 5-year-old washes the veggies, my 2-year-old transfers the veggies I chop to the blender, and then they both fight over who presses the on button while I wipe tears of unfairness and mop up the food they've dropped and squished all over the floor. It really is quite fun.

But back to the soup. I love this served with an add-your-own-toppings bar with bowls of chopped peppers, cucumbers, hardboiled eggs, and croutons that can be spooned over the top. So good!

No-Fuss Gazpacho Soup

Ingredients: 3 slices bread 2 pounds of tomatoes, cut into quarters and seeds squeezed out and discarded 1 medium cucumber, seeded and diced 1 bell pepper, seeded and diced 2 garlic cloves, roughly chopped 2 tablespoons red wine vinegar 1/4 cup extra virgin olive oil 1/2 teaspoon salt 1/4 teaspoon pepper

Directions: Place bread in a medium bowl and cover with water until saturated. Squeeze water from bread and place bread in a blender. Discard soaking water.

In the same blender, add tomatoes, cucumber, pepper, garlic and vinegar. Blend until well combined, about 1 minute. With motor running, add oil in steady stream until well blended. Stir in vinegar; season with salt and pepper.T

Transfer to refrigerator to chill before serving up to 48 hours.


How to choose the best cereal

cereal.jpeg

If your kids are like mine, they would eat cereal at every meal and snack of the day. But cereal can be one of those sneaky bad-for-you foods: The front of the box is packed with labels that make you think it's a good choice: "made with whole grains!" "now provides fiber!" "mother approved!" But front-of-box labeling is no indicator of health. To choose the healthiest cereal, you need to do your detective work on the back. Look for these 5 checkmarks before you toss that box in your cart. 

  1. Watch the sugar.  My kids love to pick their own cereal in the store, but they know to follow “mom´s 5 g rule”: each cereal must have less 5g or less of sugar per serving. Any more, and you're setting up your child for a sugar high--especially if you pair your cereal with a glass of juice. Some great options are CheerioSs, Barbara´s Original Puffins, General Mills Kix, and Kashi Honey Toasted Oats.
  2. Add "character" elsewhere. If you've ever taken a preschooler to the grocery store, you'll know that cereals targeted toward kids are conveniently placed at their eye level. We know your dirty secret, grocery-store placement person: The boxes are there so we toss it in our cart to avoid being that mom with a tantrumming toddler in aisle 5. Do yourself a favor and buy your kid a special character bowl and spoon instead of relying on the cereal to do the job.
  3. Go for fiber. Any cereal that has 3-5 grams of fiber per serving is likely a good choice. Most kids lack fiber in their diets—important for their digestive system and to keep them feeling fuller longer—and cereal is an easy way to help them reach their daily quota (around 11g a day for kids ages 3-5; more for older kids). Look for whole grain as a first ingredient, and give your bowl an extra fiber boost by topping your cereal with nuts,  fresh fruit, or ground flaxseed—something I like to do with a bowl of Cheerios!
  4. Limit the sodium. Now I don’t usually take a bite of cereal and think, “wow, this tastes salty!” But sodium is a common ingredient in packaged foods for flavor and preservation. To keep your daily sodium in check, look for a cereal that has less than 300mg per serving on that nutrition facts label again.
  5. Browse the ingredient list for junk. Artificial flavors and colors are a no-no on my list, and luckily, many cereal manufacturers are now labeling the front of their cereal boxes to let shoppers know their produce does NOT contain artificial flavors or ingredients. If you DON'T see this type of wording on the box and the ingredient list has lots of numbers and colors in it, then you might want to reconsider adding it to your cart.

What cereals are in your house that are both healthy and delicious?

Pasta with Peas and Cheese

JPEG-image-4B6EFA075FD8-1.jpeg

When spring has sprung but there's still a chill in the air, this dish is the dinner that's waiting for you to cook it. It has enough cheese to make it a comfort food for a chilly night, plus enough seasonal vegetables and herbs to make it both taste like springtime and redeem itself as a "it-has-green-veggies-so-it-must-be-healthy!" meal. For kids, it doesn't get more familiar than pasta with peas, which works to your advantage when introducing new flavors--starting with ingredients that kids are already familiar with is one of the best ways to expand their palates. In this case, your basic peas and pasta dinner gets upgraded with sugar snaps, lemon, mint, and basil to add tons of flavor and freshness for very little extra work. In fact, this whole dish comes together in as long as it takes for the water to boil and pasta to cook--and we bet you'll even have time to set the table too!

Pasta with Peas and Ricotta Serves 6-8 1 pound your choice pasta 1 pound sugar snap peas, cut into thirds 1 cup frozen peas 1/2 cup parmesan cheese 1 cup ricotta cheese 2 tablespoons olive oil Juice and zest of 1 lemon 2 tablespoons each fresh mint and basil leaves

Directions Bring a large pot of salted water to boil. While waiting, prep the remaining ingredients: Cut snap peas into thirds, zest and juice lemon, and chop up mint and basil. Cook pasta for two minutes less than the suggested cooking time on the package, then add sugar snap peas to pasta. Cook for two minutes more. Turn off the flame and stir in frozen peas until just warmed through. Drain pasta and pea mixture, reserving 1 cup of cooking water. Add pasta and peas back to the pot, drizzle with 2 tablespoons olive oil, ricotta, parmesan cheese, and 1/2 cup of pasta water, and cook over high heat for 1 minute, stirring constantly. Season to taste with salt and pepper, and add in more water if pasta looks dry. Right before serving, stir in mint, basil, lemon juice, and zest.

Picky eater protein-packed spaghetti

IMG_1197-e1492456011980.jpg

Like every 4-year-old on the planet, my son alternates between stages of scarfing down everything in site and/or protesting via hunger strike when he decides he doesn't want to eat what's on his plate. The past few weeks, he's been doing the latter--refusing to taste his dinner, which culminates in his eventually going to bed without eating a full meal (not my problem) but then waking up before the sun because he's starving (my problem, indeed). Our dinnertime rule is pretty straightforward: You don't have to like what's served, but you do have taste what's on your plate before you decide that you don't like it. And to reassure you that I'm not a mean mommy who starves her children, I always include things I know they'll eat--some apple slices, cheese and crackers, whatever--so they don't feel the "this is all you get" pressure. But alas, a few measly sides don't sustain an active boy throughout the night. And with a newborn at home that awakens a handful of times for feeding, my sleeping until the sun rises is so very very precious.

Enter this dish. It has everything we both want in a meal. He likes that it's spaghetti (and that I may or may not let him pick up strands with his fingers, tilt his head back, and open wide). I like that it's a one pot meal that everyone can eat, that it's packed with protein from the beans and noodles (I buy Barilla Protein Plus pasta, which is made with chickpea flour for added protein, and looks and tastes close to regular), and that it contains veggies that are shredded into such tiny pieces that they can't help but cling to the noodles and become all but impossible to pick out.

I hope you enjoy it as much as we do!

Picky Eater Protein-Packed Spaghetti

Ingredients:

1 pound spaghetti (We like Barilla Protein Plus Spaghetti)

2 tablespoons olive oil

3 garlic cloves, minced

2 medium zucchini or summer squash

1 can low sodium or organic small white beans, rinsed and drained*

1/2 cup shredded parmesan or romano cheese

juice of half lemon

Directions:

Bring a large pot of water to a boil. Add a teaspoon of salt and pasta and cook pasta just shy of 1 minute al dente. Reserve the pasta water.

Meanwhile, shred zucchini  using a box grater (hint: hold the stem side to make it easier.) Set aside.

Heat a large skillet over medium heat. Add olive oil and garlic to the pan. When garlic just starts to sizzle (but before it takes on any color), add shredded zucchini. Season with 1/2 teaspoon salt and 1/4 teaspoon pepper, and saute for 8 to 10 minutes.

Add hot, drained pasta to the pan. Toss spaghetti with zucchini and garlic oil. Add cheese and toss pasta with tongs. If the pasta looks dry, add reserved pasta water (start with 1/4 cup and work up from there), tossing pasta as you go. Cook over the stove for 2 minutes more. Add lemon juice and serve.

A few notes on this recipe:

*When buying canned beans, always look for ones that are low sodium or organic, since regular ones contain tons of sodium.

*If your child doesn't mind the "green things," this dish would be made even better with the addition of fresh chopped herbs (basil, mint, parsley, or a combination of the three would work), tossed in right before serving. The same is true for lemon zest.

Macaroni Pie

macaroni-pie.jpg

On our table at the holidays, my family rarely remains married to any one particular dish. We don't live by rules that say we have to eat THIS on Christmas, and THIS on Mother's Day, and so on. In fact, most of our holiday meals are new recipes that just sound really good but that we would never have time or energy to make on a normal Tuesday; a porchetta that takes 2 days to marinate in the fridge or a baked french toast with homemade berry sauce would never fit into my weekday routine. This recipe, however, is the exception in being both traditional and unfancy. Macaroni Pie--which isn't a pie at all, but more a combination of spaghetti, eggs, and an ungodly amount of cheese--has appeared on our Italian family's Easter table for generations. My grandmother learned the recipe from her mother, who learned it from her mother, and so on. And with a short list of humble ingredients and a prep time that's as long as it takes for water to boil, it's proof that simplicity often wins.

We only see this recipe once a year, and I never understand why. It's a comfort food that everyone can agree on. Adults love that it tastes like a baked version of cacio e pepe.  And try arguing with your kid to taste a food that contains both Macaroni and Pie in its name. Additionally, the recipe can be made even more convenient by baking single servings in muffin tins, rather than in one baking dish as I do in the recipe below.

Either way, I hope you enjoy it!

Macaroni Pie

Serves 16

Ingredients:

1 pound spaghetti

1 dozen eggs

2 cups shredded parmesan (get the good stuff) OR pecorino romano cheese

1 tablespoon ground black pepper (Yes, that's 1 full tablespoon, but you can reduce to 2 teaspoons if you prefer)

Directions.

Preheat oven to 400 degrees. Generously butter a 9x11 inch cake dish. Set aside.

In a large pot, bring salted water to a boil and add spaghetti. Cook pasta 2 minutes less than its suggested cooking time (pasta will continue to cook in the oven).

While you're waiting for the water to boil: In a large bowl, whisk together eggs, cheese, and pepper. Add drained pasta to the bowl and mix together until combined (two forks  or tongs usually does the trick). Pour into pan and spread evenly.

Cover with foil, and bake for 35 minutes. Remove foil than bake for 10 minutes more until the top gets nice and crunchy. Let cool for 15 minutes and then cut into 16 slices.

Notes:

*This can be made up to three days in advance. Reheat, covered,  in a 350 degree oven for 10-15 minutes.

*If you're making this in muffin tins, we recommend parchment liners to prevent stickage. Also, to make filling easier, add the cooked spaghetti directly to the muffin cups and then use a measuring cup to pour the mixture over the pasta. Reduce cooking time to 20-25 degrees covered and then an additional 5-10 minutes uncovered.


10 ideas for leftover baby food purees

baby-food.jpg

It seems to happen overnight: Your baby who once devoured baby food purees decides she only wants finger foods. Once babies begin to use their pinchers, they become more interested in perfecting picking up food from their trays, rather than being spoon fed by you. The good news is that you now have two free hands during mealtime (take this as your cue to eat!). But don't toss your freezer stash of pears, peas, and parsnips!

Whether your baby is moving on to the finger food stage or is ready for more than just single-ingredient fruit and veggies, these 10 puree-based food ideas (for baby AND you!) can help your baby transition to the next stage AND ensure your leftover stash doesn't go to waste.

  1. Stir fruit and veggie purees into plain whole milk yogurt, cottage cheese, and oatmeal. It's a delicious way to naturally sweeten without adding sugar. How's that for getting in a veggie at breakfast?
  2. Add veggie purees into sauces and pestos. Bump up the nutrition and flavor of your traditional pasta toppings! Winter and summer squash, sweet potato, pumpkin and bell pepper make great additions to tomato sauce. Green purees like peas, zucchini, kale, and spinach all get disguised when stirred into pesto.
  3.  Mix veggie purees into meatballs and meatloaf. Go for up to four ounces of puree per pound of meat to boost nutrients AND add moisture. No dry balls for your baby!
  4. Dump veggie purees into soups or stews.
  5. Use them as  teethers. Frozen cubes feel good on baby's gums. Add puree cubes to a mesh teether, like these Fresh Food Feeder, 2 Pack, Blue/Green.
  6. Blend them into a smoothie. Mix fruits and veggie cubes with ice, plain yogurt, and a bit of juice or coconut water for a refreshing and healthy breakfast or snack.
  7. Make 'em into a protein-rich dip. In a food processor, combine 1 can of white beans, 1 garlic clove, 2 ounces of veggie puree, and herbs of choice. Bean dips stick well to spoons, so if baby is learn to self feed, this is less messy than drippy foods.
  8. Toss a cube of fruit puree into a glass of champagne. Just so there's no confusion, this is for you, not baby.
  9. Stir fruit and veggie purees into pancake or waffle mix or mix into a muffin recipe.  Way healthier baking!
  10. Spread leftover fruit puree on crackers or as a jelly replacement on sandwiches. Three cheers for no added sugar!


How do you use leftover baby food? Tell us your ideas!

Yes, you CAN bring back family dinner!

family-dinner.png

There's nothing more refreshing after a day full of work, school, activities, homework, meetings, and playdates than sitting down and having dinner with my family.  It's over food that we connect, talk, share and bond. That cherished family meal doesn't happen every night; for me and for most families, that would be impossible. The good news: Research shows that it only takes a minimum of 3 shared family meals per week (breakfast and lunch count, too!) to bring your family closer and make everyone healthier. How refreshing is that? For us, family meals happen mainly on the weekends when we have more time. I love to sit and chat after our plates are clean, and I always sip my wine slowly so my husband is forced to stay at the table with me! It's those meals that remind me of growing up; as a family, we always lingered around the dining table (and we still do when I visit home!). My plea to you is that you give your kids that same privilege—the payoffs of sharing a meal together are priceless, and they include .

  • Meals tend to be healthier and nutritious when they are prepared at home.
  • Children eat more fruit and vegetables when they see other family members eating it.
  • Adults and children alike are less likely to become overweight.
  • Children learn to communicate and interact better (especially in a world where everything happens online!).
  • Family meals are linked to lower levels of depressive symptoms in all family members and improved psychological wellbeing.
  • Family meals can help prevent destructive behavior, including lower rates of smoking, drinking, and illegal drug use in pre-teens and teenagers.
  • Children perform better in school.    

10 Ways to Make Family Dinners Doable, Easy, and Fun! 

1. Think about your week before your dive into the craziness of it all. Are any weeknights free of activities and doable for dinnertime together? Then set your goal to create a minimum of 3 family meals: Friday dinners, Sunday brunches, and Saturday lunch all count!

2. Plan a few meals in advance and add the ingredients to your weekly grocery list. Having everything on hand makes it much easier to whip something up without return trips to the grocery store or stressing out about what you're going to serve.

3. Turn the TV off and make it a rule that mealtime is free of all devices--your children (and you!) can survive 20 minutes without their phones or iPads!

4. Get the kids involved in cooking. Even babies as little as 1 or 2 years old can do certain tasks, such as peeling stickers off of fruit and veggies, washing them under running water, stirring, and pressing the buttons on the blender or food processor.

5. Keep meals simple. The goal is to spend quality time together--not to waste your whole night preparing something elaborate (and then feeling let down if your kids don't eat it.)

6. Create fun themes to get kids excited about mealtime: Think Macaroni Monday, Taco Tuesday, or Special Sunday Pancakes.

7. Let your child pick a recipe a week: Go to the grocery store together, gather the ingredients, and make it together. What they'll learn goes way beyond cooking: price, measurement, and more!

8. Make it enjoyable! Leave the serious discussions for later (read: no talk about Johnny's bad day at school), and let mealtime be a relaxing, calming, and comforting time.

9. Don't put pressure on the kids to eat what's on their plates. Instead, make the focus on the conversation and let the food be secondary. Nothing spoils dinner like constant pressure from parents telling their kids to take more bites.

10. Say grace and/or go around the table and have everyone say one thing they're happy about or thankful for.


What do you do to make family meals happen? Share your ideas--and inspire each other!