

Protein-Packed Overnight Oats
/
This family-friendly make-ahead breakfast gives you all the protein you need to fuel you until lunchtime!
Read More
This family-friendly make-ahead breakfast gives you all the protein you need to fuel you until lunchtime!
Read MoreThis pretty pink berry smoothie tastes like a milkshake but is loaded with lots of fruit and even a veggie (can you guess which type?)
Read MoreOverhead Cheesy Chili Corn Chowder with corn chips and bowls and spoons

Back in 2012 when I first started teaching baby food cooking classes, a client of mine mentioned that her husband had been making chocolate avocado pudding, and that her baby was gobbling it right up. I put the idea on my imaginary list of recipes that I wanted to recreate, and then—-like every other item on my to-do list that I write in my head but never on paper—I completely forgot about it. Fast forward five years when that baby of hers is ready to graduate kindergarten, and here I am in my kitchen finally checking off this recipe. Do I regret not trying this sooner? Yes, but mostly because recently when I pay for avocados at checkout, I have to do a doubletake (2 for $5--seriously?!) and then you get home, cut it open, and it's all pit. Five years ago, if I can remember correctly, the world was a cheaper place for avocados, and hashtags like #avocadoproblems and #avocadofail and #willworkforavocados (okay fine I made that last one up), were not yet a thing.
But I digress.
In truth, this recipe was a real win for the kids, and I already am thinking ahead to tweaking the recipe for avocado-chocolate fudgsicles this summer (stay tuned!). The avocado creates a perfectly creamy texture and a blank slate that lets the chocolate from cacao powder and semi-sweet chocolate chips really shine through. It comes together in minutes after a whirl in a food processor or blender, and since it's made without refined sugar, it's a treat that I'm happy to serve my kids regularly. Also, unlike every other avocado recipe in the world, this can be made up to 24 hours in advanced and stored in the refrigerator. Because of the chocolate, there's no telling if the avocado turns brown.
Finally, another perk to this recipe is that it's allergy friendly--perfect for friends who are allergic to milk or eggs. But everyone will love it!
CHOCOLATE AVOCADO PUDDING makes 4 servings Ingredients: 2 medium ripe avocados 1/2 cup semi sweet chocolate chips 1/4 cup cacao powder* 1 tsp pure vanilla extract 1/4 cup milk (cows, almond, coconut, or even water) pinch of salt 1/4 cup pure maple syrup Directions: In a microwave safe bowl, melt chocolate chips according to package directions. Cool for a few minutes, then add them to a food processor or blender with the remaining ingredients. Blend until no lumps remain, pausing to scrape down the sides of the bowl. Transfer mousse to a bowl, cover with plastic wrap, and chill for at least 20 minutes (or up to 24 hours before serving.
*I use cacao powder instead of cocoa powder because it is much less processed than cocoa powder and it contains a crazy high amount of fiber, nutrients, antioxidants and magnesium. You can find it in the same location in the grocery store as traditional cocoa powder. Yes, it's more expensive, but we use it sparingly enough that it's worth it for us.

I'm all about feeding my family the same foods (because: sanity), and guacamole is my go-to at least twice a week. The baby gets hers mashed and spoon fed, my 3 and 6 year olds like it with chips or spread on crackers, and I do the cliche avocado toast. I love using foods that they already like as a vehicle for getting them to taste new flavors, and this is an example of that. In place of lime juice and cilantro, this springy, refreshing version is made with fresh lemon juice, mint, and peas. The peas give the guac a serving of protein (yep, peas contain this filling, muscle-building nutrient!). You could add the peas whole, slightly mashed up, or use it for leftover baby food pea puree--because cooking one thing for everyone is always a win!
PEA AND MINT GUACAMOLE
Ingredients: 2 ripe avocados 1/2 cup peas OR 1/2 cup pea puree 1 tablespoon fresh mint leaves, chopped juice from half a lemon salt and pepper to taste
Directions: Combine all ingredients in a bowl. Mash with a back of a fork until you reach the desired chunkiness (I like mine a little chunky; the kids like theirs smoother). Add salt and pepper to taste.

One of the most common questions I get from parents who are making their own baby food is "What's next?"Once their baby has moved beyond single-ingredient purees, they're ready to introduce more flavors, but aren't quite sure where to start. The baby phase when your little one is happily gobbling up everything is THE best time to introduce a whole variety of foods. In fact, studies show that babies who are exposed to a variety of flavors before age 1 eat a wider variety of foods at age 6. Talk about a victory for pickiness!
My philosophy has always been to cook once for everyone in our family--and with three kids 5 and under, it's a true sanity saver. For this recipe, I used both the zucchini and one batch of nut-free pesto to create meals for everyone from my 10-month old baby to my 40-year-old husband and everyone in between. My kids love pesto--they call it their favorite green sauce, and we put it on everything: as a spread on a sandwich, stirred into risottos, and tossed with pasta. I used a nut-free version here since I'm not quite ready to introduce nuts to the baby, and so that I dont have to worry about sending the kids to school with it on a sandwich. I also gave it an extra health boost by adding in a heaping handful of baby spinach, which has such a mild flavor that no one can tell the difference!
I started by shredded a combination of zucchini and summer squash and sauteeing it in olive oil in a deep lidded skillet until it was completely soft. While that was wilting down, I made the pesto in a food processor, and scraped all by about 1 teaspoon out into a bowl (it seriously takes less than 2 minutes to make!). For the baby, I removed 1 1/2 cups of sauteed zucchini and summer squash, and added it to the food processor and blended it all together. Her meal was done! I serve it in these Sage Squeezie Double Zipper Reusable Food Pouches
The rest of the squash I left in the saute pan and continued with the pesto chicken risotto (the full recipe is below). It's an easy, veggie-packed, 1 pot meal that my family loves. I hope yours does too!
NUT-FREE PESTO In a food processor, combine 1 bunch of fresh basil (discard the thick stems), a handful of fresh baby spinach, 1 garlic clove, juice of 1 lemon, 1/4 cup grated parmesan cheese, and a half cup of olive oil. Process until smooth, pausing to scrape down the sides of the bowl to incorporate all the ingredients.
PESTO CHICKEN RISOTTO Ingredients: 2 tablespoons olive oil 3 pounds of zucchini and summer squash, shredded 2 cups organic brown rice 1.5 pounds boneless skinless chicken thighs 5 1/2 cups organic low sodium chicken stock 1/4 cup pesto or more to taste* extra parmesan cheese for serving
Directions: In a deep lidded skillet over medium heat, saute squash in olive oil until wilted. Remove 1.5 cups for baby food if using. Add rice, chicken, and stock to the skillet. Bring to a boil, then reduce heat, cover and simmer until rice is cooked through, around 30 minutes. Stir in pesto, adding more to taste. Serve with extra grated cheese.
*store leftover pesto in the freezer in a covered airtight container

I've always found that when it comes to Thanksgiving recipes, simplicity wins. Amidst all the heavy appetizers, a massive main meal, and the loads of desserts, this soup stands out as satisfyingly simple in its elements (it contains only 5 ingredients if you don't count the butter) and with all the flavors you crave on Thanksgiving day. It also gets its creaminess from the pureed squash--yep, there's no cream here--which is a welcome relief from the loads of rich and decadent foods.
In fact, I've made this soup almost every year for the past decade as a Thanksgiving appetizer, and it's a win with everyone. With subtle sweetness from the apples, it's a crowd pleaser for kids and adults. I serve it in the slow cooker, set on low, so it stays piping hot. Add pomegranate seeds to garnish, and the colors are vibrant and beautifully Fall in nature.
There are many ways to make a squash soup, and I always use Thanksgiving as an excuse to take shortcuts. You could buy a whole squash and cut it up yourself (more on how to do that here), or you could go for my choice and buy the more convenient (albeit: more expensive) prechopped squash.And like all soups, the longer it simmers, the better the flavors develop, so be sure to make this early Thanksgiving morning or even the day before. I've even made this a week or two before Turkey Day and kept it frozen until the day of, and no one was all the wiser.
If you have a baby, this soup too is a winner! It's the perfect pureed consistency for babies who aren't quite ready for textures, but it also contains delicious flavors and spices to help expand their little palates.
Squash and Apple Soup
Ingredients:
2 tbsp. butter
2 medium onions, diced
3 tsp curry powder
3-pound butternut squash, peeled, seeded and cubed (or around 3-4 cups butternut squash cubes OR 3 cups of butternut squash puree)
2 apples, peeled, cored, cubed
·3 cups chicken stock
salt and pepper to taste
Directions:
In a large pot over medium-low heat, melt the butter. Add onion and saute until tender. Stir in curry powder
Add squash, apples, chicken stock and salt. Bring to boil, reduce heat and simmer for 25 minutes or until squash and apples are tender
Use an immersion blender to puree the soup, or alternatively, transfer to the soup in batches to a blender (careful, it will be hot!). Serve warm with pomegranate seeds as a garnish.
Ages: 8 months+ Technique: Roasting. Check out our cooking guide to learn which other vegetables require this method of cooking.
Turn it into: ROASTED BEET HUMMUS! Get our recipe for beet hummus here.
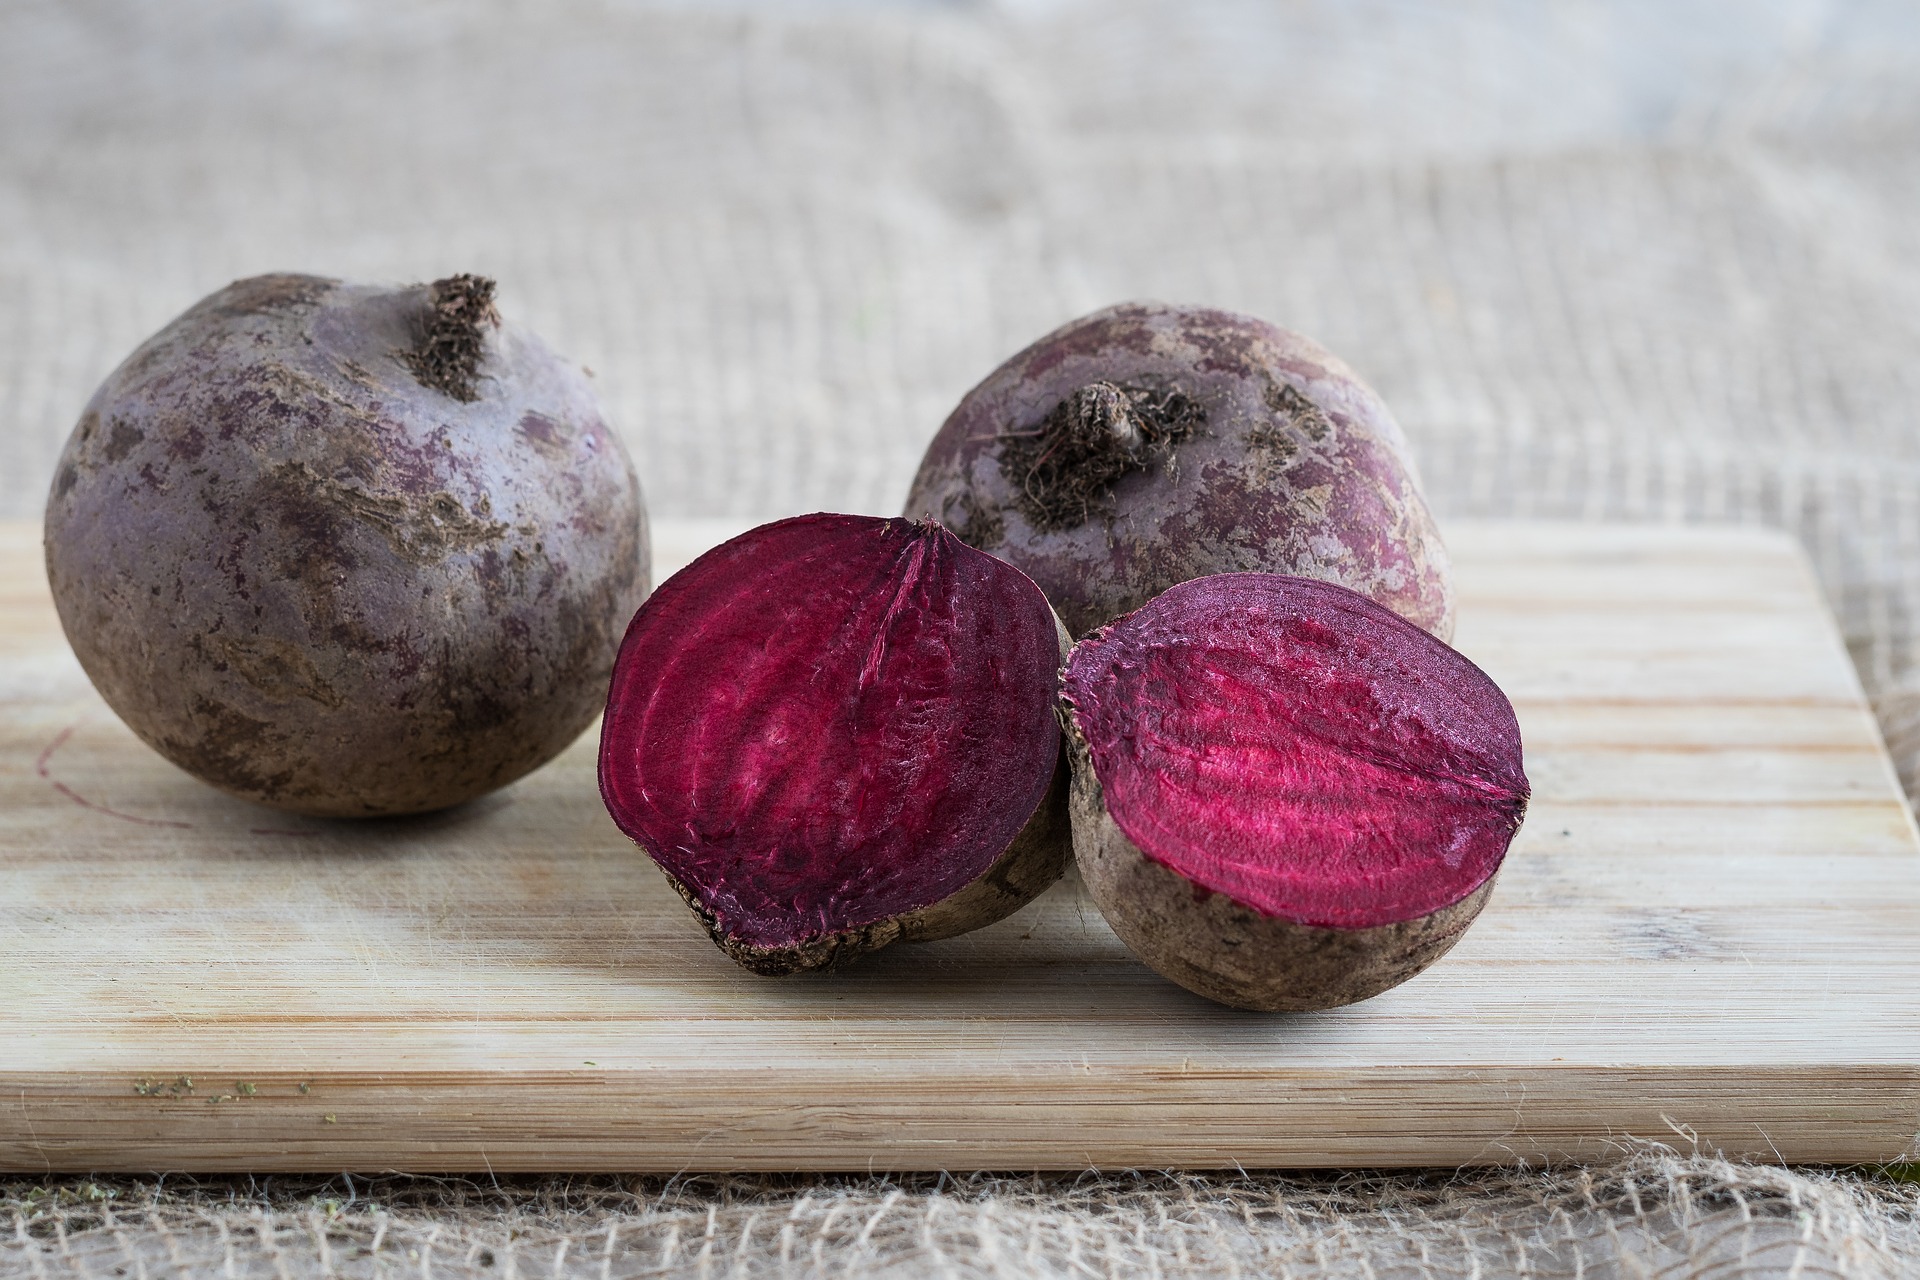
If you're brave enough to handle the cleanup (hint: feed them this before bath time) and are cool with purple poop (yep, beets will discolor their urine and stool), beets are a delicious and healthy food for baby! Learn more about beets here.
ROASTED BEET PUREE makes 10 ounces Directions: Preheat oven to 375 degrees. Wash your hands well with soap and water. Slice off the beet leaves, leaving nothing but the bulbs. Rinse three medium beets under running water and pat dry. Coat beets lightly with oil. Wrap beets in aluminum foil, place on a baking sheet, and roast in the oven until cooked through, approximately 45 minutes. You will know they are done if the beet is easily pierced with a fork. Let cool, then unwrap from the foil, and use your fingers or a vegetable peeler to peel off the beet skin. Chop beets into quarters. Add beets to a food processor and puree until completely smooth, pausing to scrape down the sides of the bowl as needed. You may need to add water, 1 tablespoon at a time, until beets reach a smooth thick consistency.
Storage instructions: Store beet puree in the refrigerator for a maximum of three days or freeze in individual servings for up to three months. Do not refreeze defrosted food.
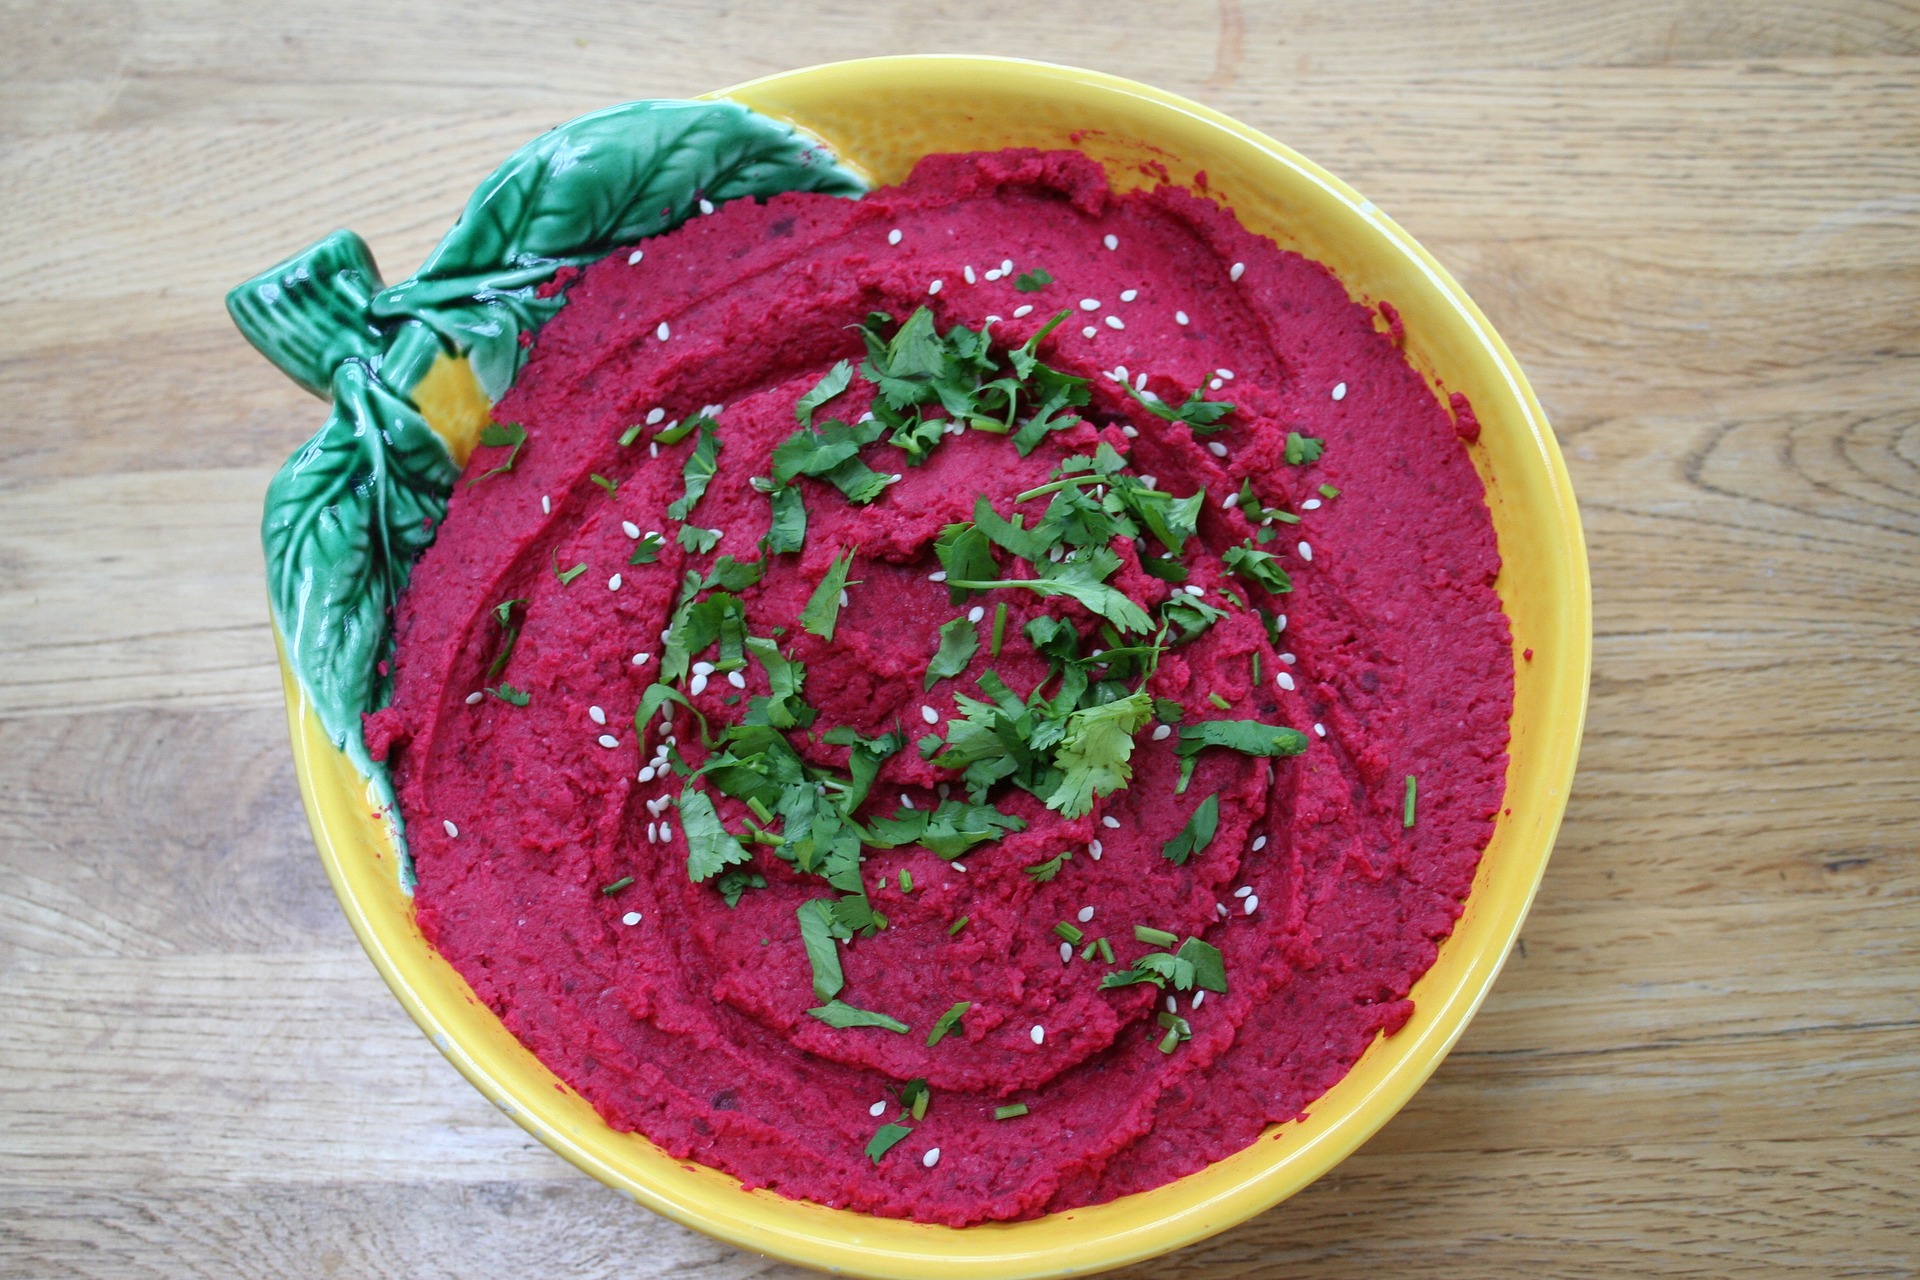
Seriously, does it get more beautiful than this? This recipe, which uses roasted beets in place of traditional chickpeas, makes a show-stopping spread (seriously, what little girl wouldn't love a PURPLE dip?) and is a great use for leftover roasted beets. I love adding this to a crudite platter alongside pita and veggies at a part--it adds a great pop of color
This recipe calls for 1 pound of roasted beets, but if you're starting out with our beet baby food ( Get the recipe here) you'll want to set aside about 1 cup of pureed beets to make this recipe in place of the cooked, roasted beets below. Add the pureed beets and follow the rest of the recipe as is.
Roasted Beet Hummus Ingredients: 1 lb cooked or roasted beets, quartered OR 1 1/2 cups beet puree 1/4 cup walnuts, toasted and roughly chopped (optional) 2 tablespoons lemon juice 1/2 tablespoon tahini 1/2 teaspoon ground cumin 1 garlic clove 1 tablespoon olive oil 1/2 teaspoon salt Directions: Place all the ingredients in a food processor and blend until smooth, stopping occasionally to scrape down the sides. Taste throughout and adjust the balance as you see fit. Serve immediately or refrigerate, covered, for up to 3 days. Garnish with sesame seeds and cilantro, if desired.

Ages: 6 months+ Technique: Blanching. Check out cooking guide to learn which other fruits require this method of cooking.
Turn it into: A champagne floater for your next moms brunch. Add 1 tablespoon of peach puree to each glass of champagne.
Peaches make a delicious and healthy first food for babies and can be introduced when your doctor gives you the okay to start solids. Fresh ripe peaches that have been peeled and cubed also make a good finger food for toddlers or for baby led weaning.
Nutrition profile: Peaches contain vitamins A and C, and are rich in many vital minerals such as potassium, fluoride, and iron. They also contain the antioxidant lutein, zeaxanthin, and ß-cryptoxanthin that protect the body from free radicals. Get more info on how to buy and store peaches by clicking here. .
PEACH PUREE makes 6-8 ounces Directions: Wash your hands well with soap and water. Rinse two medium ripe organic peaches under running water. Place peaches on a cutting board and use a paring knife to slice an X through the base of each peach. Meanwhile, bring water to a rolling boil in a medium saucepan. Use a slotted spoon to add the whole peaches to the water and boil for 2 minutes. Carefully remove peaches using a slotted spoon, and transfer peaches to a bowl filled with ice water. Let cool for two minutes in the ice bath, then use your fingers or a paring knife to peel off the skin, using the X as a starting point. Discard the skin. Slice peaches using a paring knife and working your way around the pit. Discard the pit, and place the cut fruit in a food processor. Puree until completely smooth.
Storage instructions: Store peach puree in the refrigerator for a maximum of three days or freeze in individual servings for up to three months. Do not refreeze defrosted food.

Ages: 6 months+
Technique: Boiling. Check out our cooking guide to learn which other vegetables require this method of cooking.
Turn it into: Pea and Mint Guacamole GET THE RECIPE HERE
It's no secret that peas are our favorite vegetable (it's part of our name for peas-sake!). One of the only vegetables that's high in protein, pea puree makes a great first food for babies and plain old defrosted peas make a great finger food for toddlers (and a way healthier alternative to processed finger foods). Read more about our love for peas HERE.
PEA puree
Makes approximately 20 ounces
Ingredients
1 10-ounce bag of frozen peas
1/2 cup water
Directions:
Pour water into a saucepan and bring to a boil. Add peas to the saucepan and boil for two minutes.
Using a slotted spoon, carefully transfer peas to a food processor, adding cooking liquid a little at a time until peas are smooth.
Store in the refrigerator for up to three days or freeze purees in individual serving containers and freeze, covered, for up to three months. Do not refreeze defrosted food
Storage instructions: Store pea puree in the refrigerator for a maximum of three days or freeze in individual servings for up to three months. Do not refreeze defrosted food.

Ages: 6 months+ Technique: Roasting. Check out our cooking guide to learn which other vegetables require this method of cooking.
Turn it into: Butternut squash soup GET THE RECIPE FOR BUTTERNUT SQUASH SOUP HERE OR Pasta with butternut squash sauce GET THE RECIPE FOR PASTA WITH BUTTERNUT SQUASH SAUCE HERE
With its sweet taste and easy-to-digest profile, squash makes an ideal first food for your baby. The vegetable is also an excellent source of vitamin C, a nutrient that strengthens the immune system and protects the body against infections.
BUTTERNUT SQUASH puree
Makes approximately 24 ounces
Ingredients:
1 medium butternut squash
water
Directions:
Preheat the oven to 375 degrees. Line a baking sheet with parchment paper, then fill the baking sheet with water until the water fills 1/4 up the sides of the sheet.
Use a large sharp knife to halve the squash lengthwise, then use a spoon to remove the seeds. Place squash halves face down in a baking pan.
Bake for approximately 40 minutes to 1 hour. Skin should be puckery and/or wrinkled and squash should feel soft when pressed. Scrape out the squash and then puree to creamy consistency. Add water if needed.
Storage instructions: Store squash puree in the refrigerator for a maximum of three days or freeze in individual servings for up to three months. Do not refreeze defrosted food.

In an confusing twist of events that's beyond all adult understanding, my 5-year-old decided he likes oatmeal. This ill-timed conclusion occurred once the weather settled in at a steady 80 degrees, and around the same day I decided to forgo all hot breakfasts--especially ones (ahem, oatmeal), I'd been trying to get him to eat all winter long. Oh the irony! But when a picky 5-year-old decides he likes something, you make it. Enter these overnight oats. They're so refreshing, can be prepared in advance, and are endless in their flavor possibilities. All it takes is a little advanced planning--overnight oats can be made 1-3 nights before you're ready to eat them so I usually make a bunch of individual servings in mason jars or tupperware (any lidded container will do), and we eat them throughout the week. You can substitute regular milk for coconut milk, almond milk, or whatever, and topping possibilities can include granola, nuts, seeds, shredded coconut, or fruit. And that bit of advanced planning makes mornings so much easier. Just stick in a spoon and breakfast is done.
Here are my three go-to versions. All recipes are for individual servings, but you could also quadruple the recipe make a big bowl, cover it with plastic, then scoop out as much as you'd like. I also love serving these for breakfast when staying with a big group. So much easier than frying up eggs or pancakes in the morning!
MANGO COCONUT OVERNIGHT OATS (pictured) Combine 1/2 cup rolled oats, 1/2 cup coconut milk, 1/2 cup plain yogurt, and 1 tsp honey. Stir together. Top with 1 tablespoon unsweetened flaked coconut and 1/2 cup mango chunks (I use frozen). Cover and refrigerate overnight or for up to 3 days.
MIXED BERRY OVERNIGHT OATS Combine 1/2 cup rolled oats, 1/2 cup almond milk, 1/2 cup plain yogurt, a pinch of cinnamon, and 1 tsp honey or maple syrup. Stir together. Top with 1 tablespoon each ground flaxseed, sliced almonds (optional) and 1/2 cup mixed berries. Cover and refrigerate overnight or for up to 3 days.
CHOCOLATE BANANA OVERNIGHT OATS Note: Since bananas will brown, we stir this all together and add cocoa powder to disguise the color change). Mash 1/2 of a banana, then stir in 1/2 cup rolled oats, 1/2 cup milk, 1/2 cup plain yogurt, 2 teaspoons cocoa powder and 1 tsp honey. Cover and refrigerate overnight or for up to 3 days.

If you dislike cooking, you are going to love this. If you're outside roasting on this sticky 90 degree day, you are going to love this.
If you like recipes that can be prepped and on the table in less than five minutes, you are going to love this.
If you like the idea of your child eating vegetables and if you like vegetables in their purest, most-refreshing form, then you are going to really really love this.
Because unlike many gazpacho recipes that require blanching tomatoes, peeling cucumbers, and straining the finished product, this is the no-fuss (read: no work) version. All we do is blend up veggies with little else, and the result is something so refreshing, so delicious, and so impossible to screw up (I'm looking at you, so-called non-cooks).
Best of all, my kids eat this up AND love helping with the prep. My 5-year-old washes the veggies, my 2-year-old transfers the veggies I chop to the blender, and then they both fight over who presses the on button while I wipe tears of unfairness and mop up the food they've dropped and squished all over the floor. It really is quite fun.
But back to the soup. I love this served with an add-your-own-toppings bar with bowls of chopped peppers, cucumbers, hardboiled eggs, and croutons that can be spooned over the top. So good!
No-Fuss Gazpacho Soup
Ingredients: 3 slices bread 2 pounds of tomatoes, cut into quarters and seeds squeezed out and discarded 1 medium cucumber, seeded and diced 1 bell pepper, seeded and diced 2 garlic cloves, roughly chopped 2 tablespoons red wine vinegar 1/4 cup extra virgin olive oil 1/2 teaspoon salt 1/4 teaspoon pepper
Directions: Place bread in a medium bowl and cover with water until saturated. Squeeze water from bread and place bread in a blender. Discard soaking water.
In the same blender, add tomatoes, cucumber, pepper, garlic and vinegar. Blend until well combined, about 1 minute. With motor running, add oil in steady stream until well blended. Stir in vinegar; season with salt and pepper.T
Transfer to refrigerator to chill before serving up to 48 hours.
It seems to happen overnight: Your baby who once devoured baby food purees decides she only wants finger foods. Once babies begin to use their pinchers, they become more interested in perfecting picking up food from their trays, rather than being spoon fed by you. The good news is that you now have two free hands during mealtime (take this as your cue to eat!). But don't toss your freezer stash of pears, peas, and parsnips!
Whether your baby is moving on to the finger food stage or is ready for more than just single-ingredient fruit and veggies, these 10 puree-based food ideas (for baby AND you!) can help your baby transition to the next stage AND ensure your leftover stash doesn't go to waste.
 .
.
How do you use leftover baby food? Tell us your ideas!

It's no secret that Americans consume way too much salt and sugar, and a new study in the journal Pediatrics shows that food companies may be prepping babies' and toddlers' tastebuds early to acquire these tastes. Many baby and toddler foods--even those marketed as "healthy" or "organic" contained a gross amount of excess sugar and sodium, according to researchers from the Centers for Disease Control and Prevention (CDC) . Almost half of fruit and grain based baby food contained added sugar, and foods made for toddlers—including vegetables, wheat or whole grain-based crackers, chips, sticks, or puffs—contained the sodium equivalent of plain potato chips.
We searched out the baby and toddler food offenders that pose as health foods so that you won't be duped.

Yogurt is a healthy choice for toddlers, but most of the yogurts marketed for kids (yep, even the organic brands!) contain a whopping two teaspoons of excess sugar in their tiny containers—and that's not counting the natural sugar that's already present in dairy. If you're introducing yogurt to your baby for the first time, start with plain whole fat yogurt (yep, babies won't notice that it's missing sugar!). Or for kids, sweeten yogurt naturally by adding in a squirt of honey, maple syrup, or by stirring in fruit preserves or purees. For on-the-go options, look for yogurts that contain no artificial sweeteners and contain less than 2.5 grams of sugar per ounce, like the Siggi's brand.
2. VEGGIE PUFFS
The one time I bought my toddler puffs was during an airport delay (desperate times, people!) and when I knew he'd be super squirmy on a flight and looking for snacks. But when I read the ingredients on the Sweet Potato Puffs I had just bought, I noticed that sweet potato wasn't actually an ingredient! While some puffs actually do contain sweet potato, broccoli, or kale "flour," these powders lack all the fibers of real veggies, and the nutrients from powdered vegetables may not be absorbed by the body the same way nutrients from whole vegetables are. Bottom line: Puffs should be served to kids in the same way you serve yourself refined carbohydrates: limited. For more nutritious snack choices, go for a no-sugar-added cereal, like cheerios.
3. CEREAL BARS & GRANOLA BARS

We get it: Kids love granola bars, and adults do too: They're easy, portable snacks that you can stick in your purse and pull out two weeks later if need be. But from a nutritional perspective, most bars contain nothing substantial but sugar--and most are so sickly sweet that they can prime your toddler's tastebuds to prefer overly sweet selections. In fact, the brands we researched contained THREE TYPES of processed sugar, unhealthy oils, and ingredient list thats way WAY longer than the front-of-box promise: "Made with real fruit and whole grains." There's nothing easier than making your own granola bars: We like to make a huge batch and freeze 'em, so they're just as convenient as anything processed, but way healthier. This five-ingredient recipe contains 0 added sugars and is made with nothing but whole grain goodness: In a bowl, combine 1.5 cups rolled oats, 1/2 cup unsweetened applesauce, 1 cup milk (any kind will do), 1 teaspoon cinnamon, and 3/4 cup raisins. Pour into parchment-lined loaf pan, and bake at 350 for 30 minutes until ingredients are set. Cool completely in the pan before cutting into squares.
4. BABY FOOD POUCHES MADE WITH SPINACH OR OTHER VEGGIES
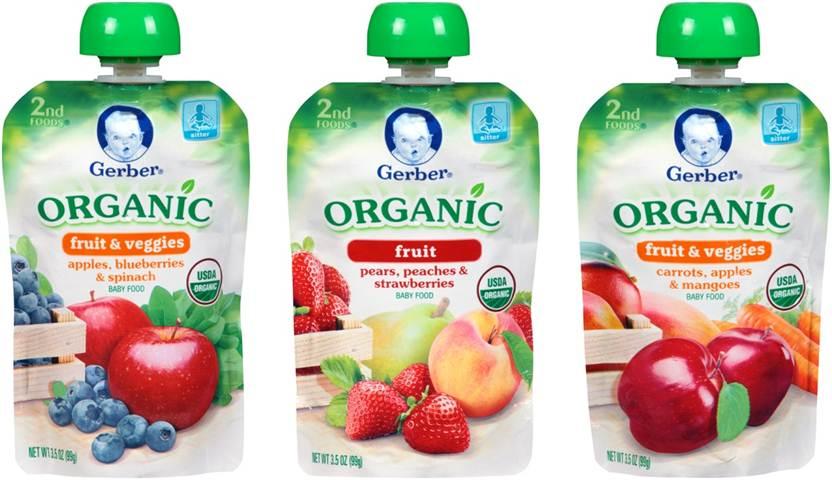
With names like "apple-spinach" and "zucchini-pear," they have to be good, right? While pouches serve their purpose (convenient, portable, etc.), relying on them as your tot's exclusive source of fruits and veggies can backfire. Check the ingredient list: Most contain "juice concentrates," which are a sneaky key word for sugar, and list the veggie as the very last ingredient, so there's not telling how much veggie they actually contain. Lastly, to maintain a shelf life, pouches are heated to super-hot temperatures, destroying the naturally-occuring nutrients that the fruits and veggies contain. (More on that here.) Consider making your own pouches, (we love the Infantino Squeeze Station) to control exactly what goes into them, and be sure to give your kids real fruits and veggies--you may be surprised to learn what they love!
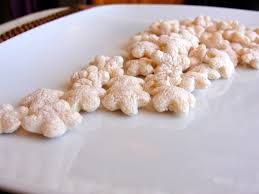
5. TEETHING BISCUITS
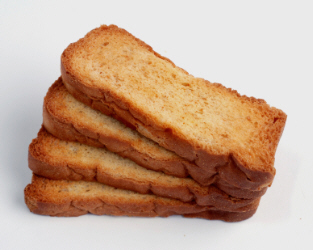
If they were labeled as what they really are ("Cookies for babies!"), no one would buy them. Hence the marketing ploy of calling them teething biscuits, which do little else to soothe teething any more so than than the calming effect of sticking a cookie in someones mouth. For serious teething relief that tastes good too, we swear by frozen bagels, frozen mango chunks or baby carrots in a mesh teether (like this here), or big thick carrots or frozen celery sticks for babies to gnaw on under adult supervision.

Finger foods are your baby's first step in the transition to table food—and let's face it: Without the need to spoon feed, you now have two hands free during meal time (score!). But many packaged finger foods that are made specifically for this toddler stage are loaded with salt and sugar, according to a recent study. Ugh! Step away from the teething crackers and pick up these nutrient- and flavor-packed choices:
FRUIT AND VEGGIES! {veggies} - steamed cut up carrots - frozen mixed veggies, defrosted - steamed chopped broccoli or cauliflower - cut cooked green beans - diced cooked squash or sweet potato - diced steamed zucchini or summer squash
{fruit} - halved blueberries - avocado chunks rolled in wheat germ or ground flaxseed for easier pickup - banana slices rolled in wheat germ or ground flaxseed for easier pickup - small chunks of peaches, plums or mango - small dices of melon - steamed apple or pear dices
HIGH PROTEIN OPTIONS {beans (when buying canned, go for organic or low sodium, and always rinse)} - small white beans - cooked lentils - black beans - small pink beans {meat, fish, and eggs} -scrambled eggs cooked in butter - flaked salmon - shredded chicken - cut up meatballs {misc.} - tofu cubes - shredded cheese or cheese cubes
HEALTHY CARBOHYDRATES - homemade muffins, cut up - frozen whole wheat bagel (great for teething!) - cheerios or other whole grain no-sugar-added cereal - cooked whole grain pasta (top with tomato sauce or a veggie puree) - plain waffles or pancakes, cut up
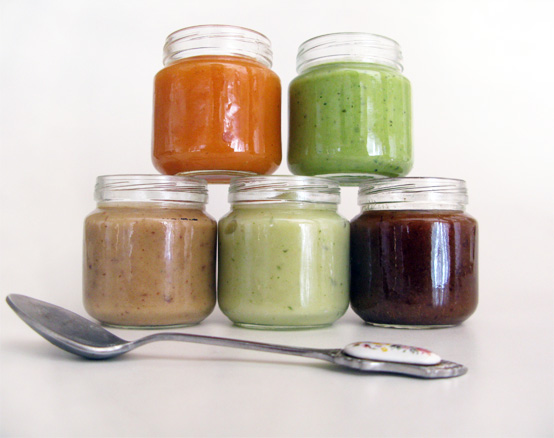
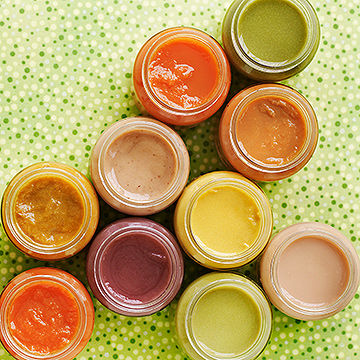
One of the most common questions I get asked about baby food is this: “Why should I make my own? Isn’t jarred food the same thing?” The truth is that while the ingredients might read the same as what you’d use to make at home (like carrots and water, for example), there are many major differences that aren’t always so noticeable. These five truths about jarred baby food are truly shocking.
The bottom line is that when you buy food from a store shelf, it’s impossible to know everything that goes into it, and making your own baby food (and using organic fruits and veggies when available), is THE BEST WAY TO know exactly what’s going into your baby’s belly.

Nothing makes the house smell quite like fall than the smell of cinnamon and apples slowly cooking all afternoon. I admit that I'm not one that often pulls out my slow cooker. Most of the good recipes I find require too many steps that, for me, eliminate the convince factor of using a slow cooker at all: searing meat and sautéing veggies before adding them to the pot. But this is worth my pulling out the heavy appliance, mainly because this recipe is a one step wonder: Just throw everything in, set it on high for four hours, and let the apples break down slowly to fill your house cinnamon-sweet smells.
From there, my four year old loves the job of official apple masher. I give him a potato masher and let him get to work! (makes 4 cups)
Peasful Kitchen was started as a social place for like minded parents to connect, learn, and enjoy making food for their families. We have since grown from a baby food company to a complete website that covers every stage of a families growth — from freezer meals for expectant moms, to baby and toddler food, to family dinners that bring smiles ( and sanity!) to your table.
Whether you’re a new mom who wants to serve your baby real food from the start, or you’re a veteran parent who wants to put more nutritious meals on the table, we can help you make dinnertime more do-able. Join us, and experience the confidence and pride that comes with taking the step to make your family healthier and happier.
CATEGORIES
We are constantly working to raise the bar on our services. If you have any questions or concerns about your experience, please let us know.
Nicole
nicole@peasfulkitchen.com

